B.A., Columbia University, Art History, 2014
Rivera, Brittne
 View of Kiva
 View of Sacristy Storeroom
 View from Center of Nave
 View of Church Sanctuary and Altar
 View of Southern Part of Nave
 View of Baptistry, Marker 15
 View of Church Portería
 View of Exterior of Nave
 View facing West
 View from West Side, distant view of San Felipe de Neri Church
 View from East Side, distant view of San Felipe de Neri Church
 Albuquerque MuseumExterior: View of Main Entrance and Sculpture Garden
 Numbe WhagehExterior: View from Center of Installation
 La JornadaExterior: View facing Center of Installation
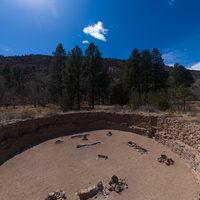 View of Big Kiva
") View of Tyuonyi Pueblo (Marker 6)
View of Tyuonyi Pueblo (Marker 6)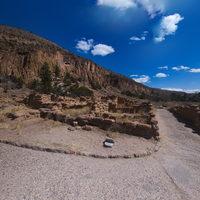 View of Tyuonyi Pueblo (Between Markers 6 & 7)
") View of Tyuonyi Pueblo (Marker 8)
View of Tyuonyi Pueblo (Marker 8)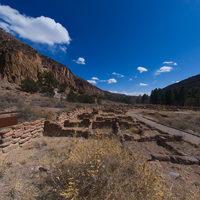 View of Tyuonyi Pueblo (Marker 9)
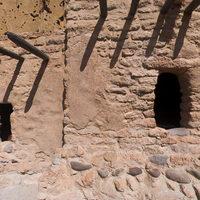 View in front of Reconstructed Talus House (Marker 13)
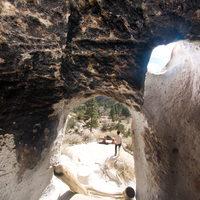 View from Inside Talus House Cavate (Marker 11)
") View of Talus House Cavate (Marker 13)
View of Talus House Cavate (Marker 13)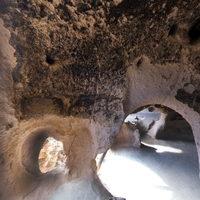 View from Inside Talus House Cavate (Marker 14)
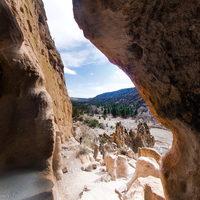 View from Inside Talus House Cavate (Marker 14)
") View from Inside Talus House Cavate (Marker 14, Central Room)
View from Inside Talus House Cavate (Marker 14, Central Room)") View of Talus House Cavate (Marker 15)
View of Talus House Cavate (Marker 15)") View from Inside Talus House Cavate (Marker 15)
View from Inside Talus House Cavate (Marker 15)") View of Long House (Marker 19)
View of Long House (Marker 19)") View of Long House (Between Markers 19 & 20)
View of Long House (Between Markers 19 & 20)") View of Long House (Marker 20)
View of Long House (Marker 20)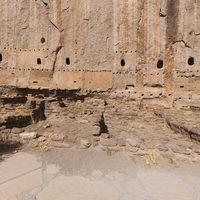 View of Long House (Between Markers 20 & 21)
") View of Long House (Marker 21)
View of Long House (Marker 21)") View of Long House (Marker 21)
View of Long House (Marker 21) View Near Marker 3
 View at Marker 4, Lookout Point
 View at Marker 5
 View of Interior of a Room on Eastern Edge
 View of Remnants of a Wall in Southeast corner
 View of Interior of Room in Southeast Corner
 View at Western Trail Entrance
 View of West Wing
 View of Plaza
 View of Northeastern Portion of Plaza
 View of a Room in Northeast Corner
 Interior of a Room in Northeast Corner
 View Northern Wall from NE Corner
 View From Center of Northern Wall
 View of Exterior Northern Wall from Northwest Corner
 View of the West Wing
 View of Unexcavated Kiva, Marker 1
 View at Marker 3
 View Near Marker 2
 View of Room Near Marker 2
 View of Remains of Colonnade Wall
 View of Great Kiva
 View of Rooms near Marker 6
 View of kivas Near Marker 7
 View Between Marker 7 and Marker 8
 View at Marker 9 of “Kiva G Complex”
 View of Exterior Northern Perimeter
 View of Interior of Room Near Marker 9
 View at Marker 10
 View at Marker 11
 View of Exterior Northeastern Perimeter
 View of Talus Unit Structure
 View of Western Portion of Talus Unit Structure
 View from Trail Entrance
 View of Core and Veneer Walls at Marker 1
 View at Marker 2
 Elevated View at Marker 4
 View from Marker 5
 View at Marker 6
 View West of Marker 7
 View North of Marker 8
 View at Marker 8
 View of Near Marker 8
 View of Eastern Plaza
 View of Great Kiva in Western Plaza
 View of Southwestern Corner
 View of Great Kiva
 View at Marker 11
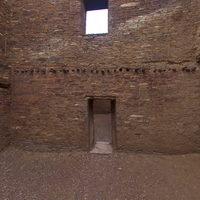 Interior of Room at Marker 12
 Interior of Room at Marker 13
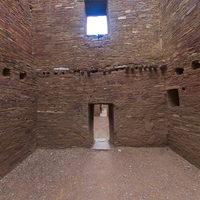 Interior of Room at Marker 14
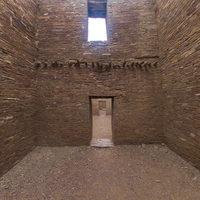 Interior of Room at Marker 15
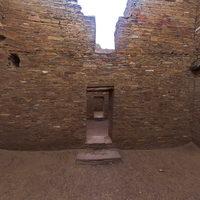 Interior of Room at Marker 16
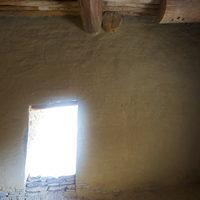 Interior of Enclosed Room at Marker 17
 Interior of Room at Marker 18
 View at Trail Entrance Near Marker 1
 View at Marker 3
 View at Marker 4
 View at Marker 5
 View Near Marker 9
 View South of Marker 10
 View from Northern Antechamber of Great Kiva
 View of Interior of Great Kiva
 View from Southern Antechamber
 View of Cross Section of Broken Wall Near Marker 4
 Exterior: View of Stations of the Cross by Gib Singleton and Gazebo
 Exterior: View of Madonna and Child Statue, Gazeebo and Northeast End of Church
 Santuario de ChimayóExterior: View of Front Courtyard
 Exterior: View between Welcome Center and South Corner of Church
 Santuario de ChimayóExterior: View of Northwest Facade of Church
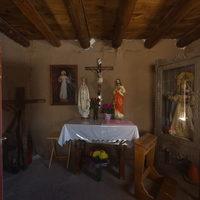 Santuario de ChimayóInterior: View of Southern Chapel
 Santuario de ChimayóInterior: View of Nave from Southwest End of Church
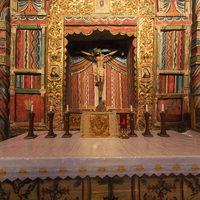 Santuario de ChimayóInterior: View of Nave with Reredos from Altar
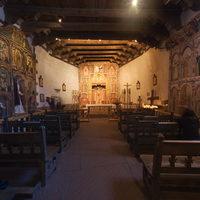 Santuario de ChimayóInterior: View of Nave and Altar from Center of Nave
 Santuario de ChimayóInterior: View of Prayer Room with Discarded Crutches
 University of New MexicoView of Installation and Yale Park
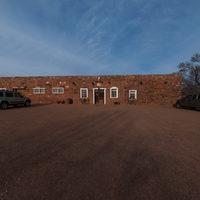 Hubbell Trading PostExterior: View of Wareroom
 Hubbell Trading PostExterior: View of Barn
 Hubbell Trading PostExterior: View of Administrative Offices
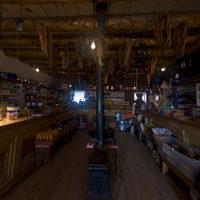 Hubbell Trading PostInterior: View of Trading Post
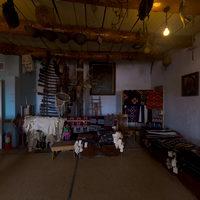 Hubbell Trading PostInterior: View of Trading Post
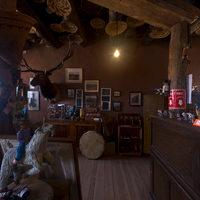 Hubbell Trading PostInterior: View of Trading Post
 Hubbell Trading PostExterior: Hubbell Home, View of Porch
 Hubbell Trading PostExterior: Hubbell Home, View of Front Yard
 Hubbell Trading PostExterior: Hubbell Home, View of Side Yard
 Hubbell Trading PostInterior: Hubbell Home, View of Near Front Door
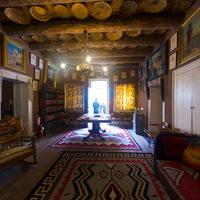 Hubbell Trading PostInterior: Hubbell Home, View of Near Courtyard
 Hubbell Trading PostExterior View of Courtyard
 Hubbell Trading PostInterior: View of Kitchen
 Hubbell Trading PostInterior: View of Dining Room
 Hubbell Trading PostExterior: Hubbell Home, View of Backyard, Trading Post, Administrative Offices, and Barn
 Hubbell Trading PostExterior: View of Chicken Coop
 Hubbell Trading PostExterior: View of Kiva
 Misión de San Agustín de IsletaExterior: View of Front Courtyard
 Misión de San José de LagunaExterior: View of Front Courtyard
 Misión de San José de LagunaExterior: View From Road in Front of Courtyard
 Misión de San José de LagunaExterior: View of Courtyard in Front of Entrance
 Misión de San José de LagunaExterior: View of Rear of Church
 Loretto ChapelExterior: View of Front from Gate
 Loretto ChapelInterior: View of Altar and Nave, Miraculous Staircase in the background
 Loretto ChapelInterior: View of Nave from Front Entrance
 View facing Southwest
 View of Southwest corner
 View of Interior of Southwestern Kiva and Adjacent Rooms
 View of Kiva and Adjacent Rooms
 View of Kiva and Adjacent Rooms Near Marker 6
 View of Northwest corner
 View of First Courtyard
 View near Marker 4
 View of Two Kivas and Adjacent Rooms
 Sun Point View from Overlook
 View from Overlook
 View from Overlook
 View of Southwestern Border
 View in Alcove Along Southwestern Border
 View of Sun Temple and Adjacent Tower
 View Looking Down into Sun Temple
 View of Tower and Adjacent Kiva
 View of Southern Border
 View of Kiva in Southeastern Corner
 Navajo Nation Council ChamberExterior: View of Main Entrance
 The History and Progress of the Navajo NationInterior: View of Chamber, Mural
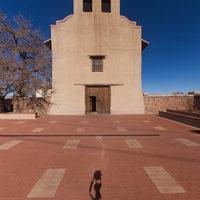 Santuario de Nuestra Señora de GuadalupeExterior: View of Front Courtyard
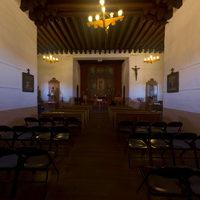 Santuario de Nuestra Señora de GuadalupeInterior: View of Nave from Center
 Santuario de Nuestra Señora de GuadalupeInterior: View of Altar and Nave
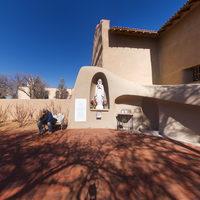 Santuario de Nuestra Señora de GuadalupeExterior: View of Southwest Courtyard
 San Francisco de Asís Mission ChurchExterior: View of Rear of Church
 San Francisco de Asís Mission ChurchExterior: View of Front, Courtyard
 San Felipe de Neri ChurchExterior: View of Courtyard
 San Felipe de Neri ChurchInterior: View from Center of Nave
 San Felipe de Neri ChurchInterior: View from Front of Altar
 San Miguel ChapelInterior: View of Front Courtyard
 La Fonda on the PlazaInterior: View of Hotel Lobby
 La Fonda on the PlazaInterior: View of Hotel Hallway
 IAIA Museum of Contemporary Native ArtsExterior: View of Colonnade
 IAIA Museum of Contemporary Native ArtsExterior: View of Colonnade
 Santa Fe PlazaView of Square from West Side of Plaza
 Santa Fe PlazaView of Square from East Side of Plaza
 Tamarind InstituteInterior: View of Mounting Room
 Tamarind InstituteInterior: View of Archival Storage Room
 Tamarind InstituteInterior: View of Gallery
 Tamarind InstituteInterior: View of Gallery
 Tamarind InstituteInterior: View of Gallery
 Tamarind InstituteInterior: View of Print Studio
 Tamarind InstituteInterior: View of Print Studio
 Tamarind InstituteInterior: View of Print Studio
 Tamarind InstituteInterior: View of Print Studio
 Tamarind InstituteInterior: View of Artist’s Room
 View from Center of Plaza
 View from Northeast Corner of Plaza
 Hotel La Fonda de TaosInterior: View of Front Desk of La Fonda
 Hotel La Fonda de TaosInterior: View of Lobby of La Fonda
 Kit Carson Home and MuseumExterior: View of Courtyard and Entrance
 Exterior: View of Taos Inn Restaurant (1899)
 Governor Bent House and MuseumExterior: View of Entrance to Governor Bent House Museum
 La Puerta del SolView from center of installation
 San José de Gracia ChurchExterior: View of Front and Gate from Atrium
 San José de Gracia ChurchExterior: View of Northwest Facade
 University of New MexicoView from Southern End of Cornell Mall
 Modern ArtInstallation View from Cornell Mall, Southeast of Student Union Building
 Zimmerman LibraryView of exterior and Smith Plaza
 University of New MexicoView of Zimmerman Library, Student Union, and Humanities Building from Smith Plaza
 University of New MexicoView of Duck Pond between Zimmerman Library and Scholes Hall from East
 University of New MexicoView of Duck Pond between Zimmerman Library and Scholes Hall from Center of Bridge
 University of New MexicoView from North
 Center of the UniverseView of Interior of Installation
 University of New MexicoView of Walkway between Alumni Memorial Chapel and Bandelier Hall