Search the Collection

View from West Side

View from East Side

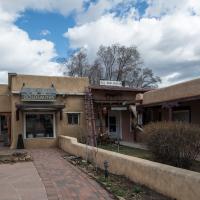
View of Main Entrance and Sculpture Garden

View from Center of Installation
View facing Center of Installation

View Near Marker 3

View at Marker 4, Lookout Point

View at Marker 5

View of Interior of a Room on Eastern Edge

View of Remnants of a Wall in Southeast corner

View of Interior of Room in Southeast Corner

View at Western Trail Entrance

View of West Wing

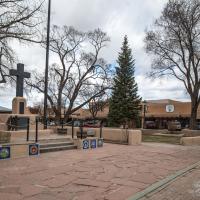
View of Plaza

View of Northeastern Portion of Plaza

View of a Room in Northeast Corner

Interior of a Room in Northeast Corner

View Northern Wall from NE Corner

View From Center of Northern Wall

View of Exterior Northern Wall from Northwest Corner

View of the West Wing

View of Unexcavated Kiva

View at Marker 3.

View Near Marker 2

View of Room Near Marker 2

View of Remains of Colonnade Wall

View of Great Kiva

View of Rooms near Marker 6

View of kivas Near Marker 7

View Between Marker 7 and Marker 8

View at Marker 9 of “Kiva G Complex”

View of Exterior Northern Perimeter

View of Interior of Room Near Marker 9

View at Marker 10

View at Marker 11

View of Exterior Northeastern Perimeter

View of Talus Unit Structure

View of Western Portion of Talus Unit Structure

View from Trail Entrance

View of Core and Veneer Walls at Marker 1

View at Marker 2

Elevated View at Marker 4

View from Marker 5

View at Marker 6

View West of Marker 7

View North of Marker 8

View at Marker 8

View of Near Marker 8

View of Eastern Plaza

View of Great Kiva in Western Plaza

View of Southwestern Corner

View of Great Kiva at Marker 1036.060455,-107.961548

View at Marker 11

Interior of Room at Marker 12

Interior of Room at Marker 13

Interior of Room at Marker 14

Interior of Room at Marker 15

Interior of Room at Marker 16

Interior of Enclosed Room at Marker 17

Interior of Room at Marker 18

View at Trail Entrance Near Marker 1

View at Marker 3

View at Marker 4

View at Marker 5

View Near Marker 9

View South of Marker 10

View from Northern Antechamber of Great Kiva

View of Interior of Great Kiva

View from Southern Antechamber

View of Cross Section of Broken Wall Near Marker 4

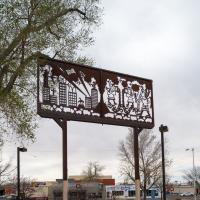
View of Installation and Yale Park

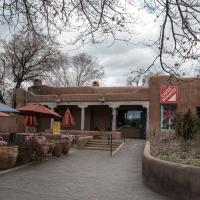
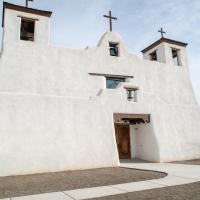
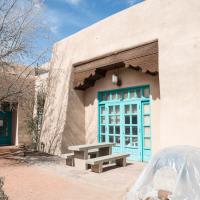
Exterior: View of Courtyard

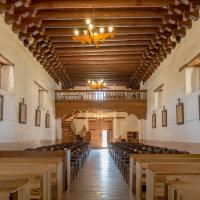
Interior: View from Center of Nave

Interior: View from Front of Altar

Interior View of Mounting Room

Interior View of Archival Storage Room

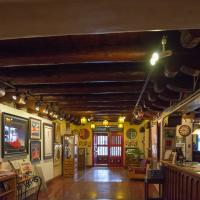
Interior View of Gallery

Interior View of Gallery

Interior View of Gallery

Interior View of Print Studio

Interior View of Print Studio

Interior View of Print Studio

Interior View of Print Studio

Interior View of Artist’s Room

View from Southern End

View of Cornell Mall, Southeast of Student Union Building

View of exterior and Smith Plaza

View of exterior and Smith Plaza

View from East

View from Center of Bridge

View from North

View of Interior of Installation

View of Walkway between Alumni Memorial Chapel and Bandelier Hall

Entryway with Views of Alumni Memorial Chapel

Interior: Museum Entrance

Interior: Windows to Viewing Deck

Exterior: La Jornada Monument

Exterior: La Jornada Monument

Exterior: La Jornada Monument

Exterior: La Jornada Monument

Exterior: La Jornada Monument

Exterior: La Jornada Monument

Exterior: La Jornada Monument

Exterior: La Jornada Monument

Exterior: La Jornada Monument

Exterior: La Jornada Monument

Exterior: La Jornada Monument

Exterior: La Jornada Monument

Exterior: La Jornada Monument

Exterior: La Jornada Monument, Pig

Exterior: La Jornada Monument, Juan de Onate

Exterior: La Jornada Monument

Exterior: La Jornada Monument, Juan de Onate

Exterior: View of North Gallery and Variation Nuevo Mexico Sculpture

Exterior: View of La Jornada and Museum of Natural History

Exterior: View of Alice King Community School

Exterior: La Jornada Monument

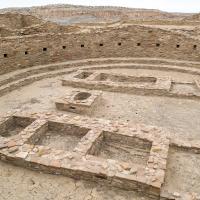
Una Vida Ruins

Una Vida Ruins

Una Vida Ruins

Una Vida Ruins

Una Vida Ruins

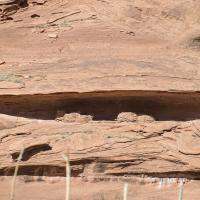
Una Vida Cliff Wall

Una Vida Cliff Wall

Una Vida Cliff Wall

Una Vida Wall Fragments

Una Vida Wall Fragment

Una Vida Wall Fragment

Una Vida Wall Fragment

Una Vida Ruins

Una Vida Wall Fragment

Una Vida Wall Fragment

Una Vida Wall Fragment

Una Vida Wall Fragment

Una Vida Wall Fragment

Una Vida: View of Canyon

Una Vida Kiva Fragment

Una Vida Wall Fragment and Fajada Butte

Una Vida: Wall Fragment

Una Vida Wall Fragment

Una Vida Wall Fragment

Una Vida Wall Fragment

Una Vida Wall Fragment

Una Vida Wall Fragment

Una Vida Wall Fragment

Una Vida Wall Fragments

Una Vida Wall Fragment

Una Vida Wall Fragments

Una Vida Wall Fragments

Una Vida Wall Fragment

Una Vida: View of Wall Fragments and Canyon

Una Vida: Boulders and Wall Fragment

Una Vida: View Overlooking Ruins

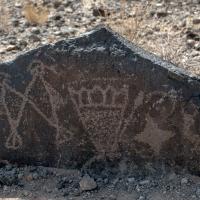
Una Vida Petroglyphs

Una Vida Petroglyphs

Una Vida Petroglyphs

Una Vida Petroglyphs

Una Vida Petroglyphs

Una Vida Petroglyphs

Una Vida Petroglyphs

Una Vida Petroglyphs

Una Vida Petroglyphs

Una Vida Petroglyphs

Una Vida Petroglyphs

Una Vida Petroglyphs

Una Vida Petroglyphs

Una Vida Petroglyphs

Una Vida Petroglyphs

Una Vida Petroglyphs

Una Vida Petroglyphs

Una Vida Petroglyphs

Una Vida Petroglyphs

Una Vida Petroglyphs

Una Vida Petroglyphs

Una Vida Petroglyphs

Una Vida Wall Fragments

Una Vida Wall Fragment

Una Vida Wall Fragments

Una Vida Great House Ruin

Una Vida Great House Ruin

Una Vida: Wall of Great House

Una Vida: Wall of Great House

Una Vida Great House

Una Vida: Interior Walls of Great House

Una Vida: Interior Walls of Great House

Una Vida: Interior Walls of Great House

Una Vida: Interior Walls of Great House

Visitor's Center: Aerial Photograph of Chaco

Visitor's Center: Aerial Photograph of Chaco

Hungo Pavi: Wall Fragments

Hungo Pavi: Wall Fragments

Hungo Pavi: Wall Fragments