Search the Collection

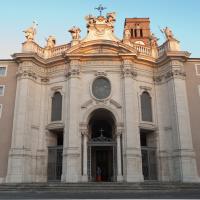
View of the front of the Ara Pacis

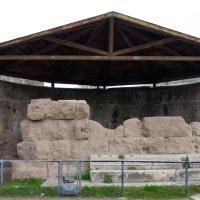
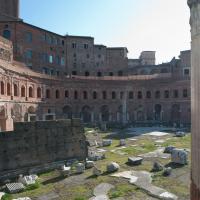
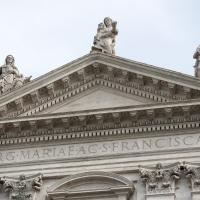
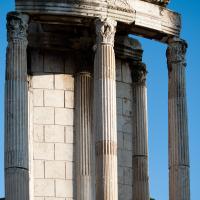
View of the southwest corner of the Ara Pacis

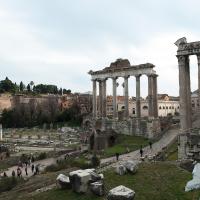
View of the southwest corner of the Ara Pacis

View of the western face of the Ara Pacis showing the Imperial Family procession

View of the northwest corner of the Ara Pacis

View of the Tellus Panel of the Ara Pacis

View of the northeast corner of the Ara Pacis

View of the eastern face of the Ara Pacis

View of the eastern face of the Ara Pacis

View of the eastern face of the Ara Pacis

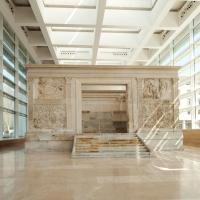
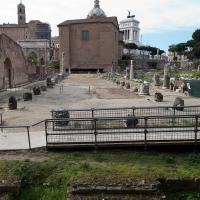
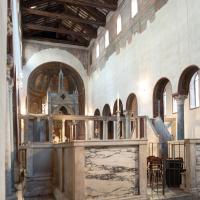
View into the enclosure of the Ara Pacis from the north

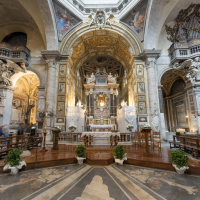
View inside the enclosure of the Ara Pacis

View inside the enclosure of the Ara Pacis

View inside the enclosure of the Ara Pacis

View inside the enclosure of the Ara Pacis

View inside the enclosure of the Ara Pacis

View inside the enclosure of the Ara Pacis

View inside the enclosure of the Ara Pacis

View of the northern face of the Ara Pacis

Detail of vegetal carving on the Ara Pacis

Detail of vegetal carving on the Ara Pacis

Detail of fragments of the Imperial procession on the Ara Pacis

Detail of fragments of the Imperial procession on the Ara Pacis

Detail of the Tellus Panel on the Ara Pacis

Detail of the Tellus Panel on the Ara Pacis

Detail of vegetal carving on the Ara Pacis

Detail of a fragment of a figure on the Ara Pacis

View inside the enclosure of the Ara Pacis

View inside the enclosure of the Ara Pacis

View inside the enclosure of the Ara Pacis

Detail of a griffin inside the enclosure of the Ara Pacis

Detail of a griffin inside the enclosure of the Ara Pacis

Detail of a garland inside the enclosure of the Ara Pacis

Detail of the altar inside the enclosure of the Ara Pacis

Detail of the frieze of the altar inside the enclosure of the Ara Pacis

Detail of the frieze of the altar inside the enclosure of the Ara Pacis

Detail of the frieze of the altar inside the enclosure of the Ara Pacis

Detail of the altar inside the enclosure of the Ara Pacis

Detail of the altar inside the enclosure of the Ara Pacis

Detail of a griffin inside the enclosure of the Ara Pacis

Detail of a griffin inside the enclosure of the Ara Pacis

Detail of the altar inside the enclosure of the Ara Pacis

Detail of the altar inside the enclosure of the Ara Pacis

Detail of the Lupercal Panel of the Ara Pacis

Detail of the Lupercal Panel of the Ara Pacis

Detail of vegetal carving on the Ara Pacis

Detail of vegetal carving on the Ara Pacis

Detail of the Imperial Family procession on the Ara Pacis

Detail of the Imperial Family procession on the Ara Pacis

Detail of the Imperial Family procession on the Ara Pacis

Detail of the Imperial Family procession on the Ara Pacis

Detail of the Imperial Family procession on the Ara Pacis

Detail of vegetal carving on the Ara Pacis

Detail of vegetal carving on the Ara Pacis

Detail of vegetal carving on the Ara Pacis

Detail of vegetal carving on the Ara Pacis

Detail of vegetal carving on the Ara Pacis

Detail of vegetal carving on the Ara Pacis

Detail of the Imperial Family procession on the Ara Pacis

Detail of the Imperial Family procession on the Ara Pacis

Detail of the Imperial Family procession on the Ara Pacis

Detail of the Imperial Family procession on the Ara Pacis

Detail of the Imperial Family procession on the Ara Pacis

Detail of vegetal carving on the Ara Pacis

Detail of vegetal carving on the Ara Pacis

Detail of vegetal carving on the Ara Pacis

Detail of vegetal carving on the Ara Pacis

Detail of the Imperial Family procession on the Ara Pacis

Detail of vegetal carving on the Ara Pacis

Detail of vegetal carving on the Ara Pacis

Detail of vegetal carving on the Ara Pacis

Detail of vegetal carving on the Ara Pacis

Detail of vegetal carving on the Ara Pacis

Detail of vegetal carving on the Ara Pacis

Detail of Tellus Panel on the Ara Pacis

Detail of Tellus Panel on the Ara Pacis

Detail of Tellus Panel on the Ara Pacis

Detail of vegetal carving on the Ara Pacis

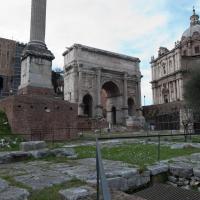
View of the western face of the Ara Pacis

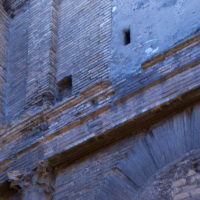
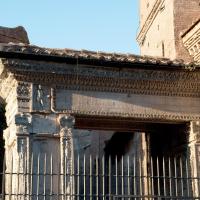
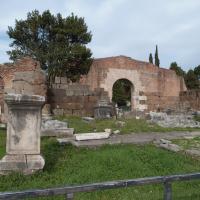
View of the top of the Arch where it is joined to San Giorgio al Velabro

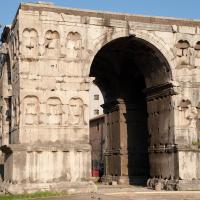
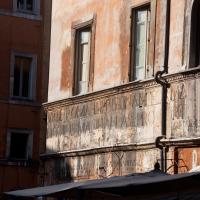
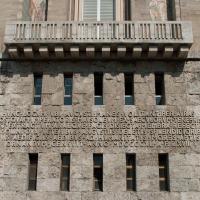
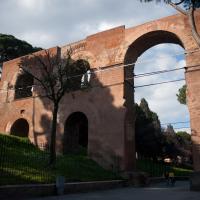
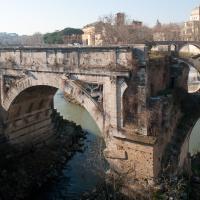
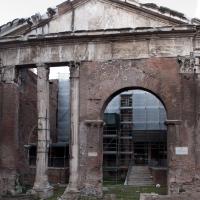
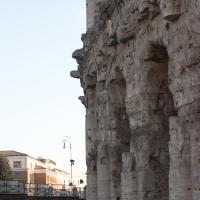
View of the Arch where it is joined to San Giorgio al Velabro

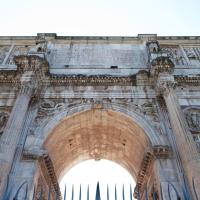
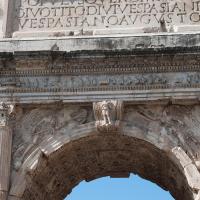
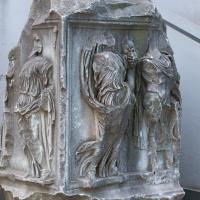
Detail: View of the Sculpture on the Architrave of the Arch

Detail: View of a relief of Hercules on the Architrave of the Arch

Detail View

Detail View

Detail: View of Septimius Severus and Julia Domna on the inside of the arch above the Sacrifice of a Bull

Detail View

Detail View

Detail View

Detail: View of a Sacrifice on the inside of the Arch

Detail: View of Caracalla on the inside of the Arch

Detail: View of Caracalla on the inside of the Arch

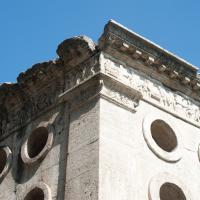
Detail: View of Garlands and Capitals above Caracalla on the inside of the Arch

Detail: View of Garlands and Capitals above Septimius Severus on the inside of the Arch

Detail: View of a Sacrifice of a Bull on the inside of the Arch

Detail: View of a Sacrifice of a Bull on the inside of the Arch

Detail: View of a Sacrifice of a Bull on the inside of the Arch

Detail: View of Septimius Severus and Julia Domna on the inside of the Arch

Detail: View of Septimius Severus and Julia Domna under a Garland on the inside of the Arch

Detail: View of Soldiers and Prisoners on the outside of the Arch

Detail: View of Soldiers and Prisoners on the outside of the Arch

Detail: View of Soldiers and Prisoners on the outside of the Arch

Detail: View of Four Sacrificial Attendants with an Incense Burner on the outside of the Arch

Detail: View of Carving on the Architrave of the outside of the Arch

Detail: View of Soldiers and Prisoners on the outside of the Arch

Detail: View looking towards Septimius Severus and Julia Domna on the inside of the Arch

Detail: View looking towards Septimius Severus and Julia Domna on the inside of the Arch

Detail: View looking upwards towards Pilaster Capitals on the Arch

Detail: View looking upwards towards carving on the underside of the Arch
")
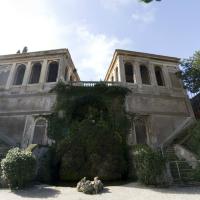
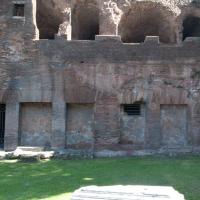
Interior: NW Palaestra (view from SW end of the room)
")
Interior: NW Palaestra (view from center of the room)
")
Interior: NW Palaestra (view from NE end of the room)
")
Interior: NW Palaestra (view from SE end of the room)

Interior: Apodyterium

Interior: Vestibule to Frigidarium

Interior: View of Frigidarium from NW

Interior: View from NW end of Frigidarium

Interior: View from SE end of Frigidarium

Interior: View from SE end of Frigidarium

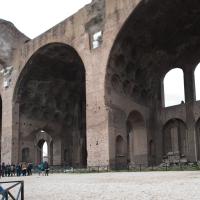
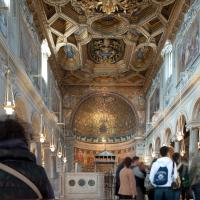
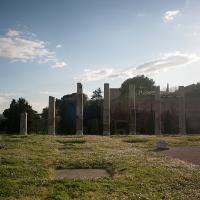
Interior: View of Great Hall from NE entrance

Interior: View from center of the Great Hall

Interior: Great Hall, View from NW end

Interior: Great Hall, view from NW

Interior: Great Hall, view from SE

Interior: Great Hall, view from SE end

Interior: SE Palaestra,View from NW apse

Interior: SE Palaestra,View from SE

Interior: SE Palaestra,View from SW

Interior: SE Palaestra, North corner, looking into dressing room

Exterior: View from West corner of inner complex
")
Exterior: View from SW (entire SW facade of inner complex)

View of a decorative floor mosaic in the Baths of Caracalla

View of a decorative floor mosaic in the Baths of Caracalla

View of a decorative floor mosaic in the Baths of Caracalla

View of a decorative floor mosaic in the Baths of Caracalla

View of a decorative floor mosaic in the Baths of Caracalla

View of a decorative floor mosaic in the Baths of Caracalla

View of a Fragment of a marble relief frieze

View of a Fragment of a marble entablature

View of a decorative floor mosaic in the Baths of Caracalla

View of a decorative floor mosaic in the Baths of Caracalla

View of a decorative floor mosaic in the Baths of Caracalla

View of a decorative floor mosaic in the Baths of Caracalla

View of an architectural fragment in the Baths of Caracalla

View of an architectural fragment in the Baths of Caracalla

View of a fragment of a black and white mosaic

View of a fragment of a black and white mosaic

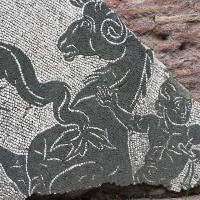
View of a fragment of a black and white mosaic with a striding figure

View of a fragment of a black and white mosaic with a winged figure

View of a small brick window in the Baths of Caracalla

View of broken column shafts in the Baths of Caracalla

View of inset semicircular steps in the Baths of Caracalla

View of inset semicircular steps in the Baths of Caracalla

View of inset semicircular steps in the Baths of Caracalla

View of inset semicircular steps in the Baths of Caracalla

View of fragments of black and white mosaics

View of fragments of black and white mosaics

View of fragments of black and white mosaics

View of fragments of black and white mosaics

View of a fragment of a black and white mosaic

View of fragments of black and white mosaics

View of fragments of black and white mosaics

View of a fragment of a black and white mosaic

View of a fragment of a black and white mosaic

View of a fragment of a black and white mosaic

View of a fragment of a black and white mosaic

View of fragments of black and white mosaics

View of fragments of black and white mosaics

View of fragments of black and white mosaics

View of a fragment of a black and white mosaic

View of a small brick window in the Baths of Caracalla

View of a fragment of a black and white mosaic

View of a fragment of a black and white mosaic

View of a fragment of a black and white mosaic

View of a fragment of a black and white mosaic

View of a fragment of a black and white mosaic

View of a fragment of a black and white mosaic

View of a fragment of a black and white mosaic

View of a fragment of a black and white mosaic

View of a fragment of a black and white mosaic

View of a fragment of a black and white mosaic

View of a fragment of a black and white mosaic

View of a fragment of a black and white mosaic

View of a fragment of a black and white mosaic

View of a decorative floor mosaic in the Baths of Caracalla

View of fragments of black and white mosaics with a broken column shaft

View of fragment of black and white mosaics against a wall with niches

View of fragments of black and white mosaics

View of fragments of black and white mosaics

View of fragments of black and white mosaics

View of fragments of black and white mosaics

View of fragments of black and white mosaics