architectural space / structure
: Built Environment > architectural space / structure
 Storage Hall, Interior: Kujaku-no-ma (Peacock Room), view of original screens from Kyaku-den (Guest Hall)
 Storage Hall, Interior: Kujaku-no-ma (Peacock Room), view of original screens from Kyaku-den (Guest Hall)
 Storage Hall, Interior: Sansui-no-ma (Landscape Room), view of original screens from Kyaku-den (Guest Hall)
 Storage Hall, Interior: Sansui-no-ma (Landscape Room), view of original screens from Kyaku-den (Guest Hall)
 Storage Hall, Interior: Sansui-no-ma (Landscape Room), view of original screens from Kyaku-den (Guest Hall)
 Room") Storage Hall, Interior: Bashō-no-ma (Kakushigi-no-ma) (Basho Room (Kakushigi Room)), view of original screens from Kyaku-den (Guest Hall)
Storage Hall, Interior: Bashō-no-ma (Kakushigi-no-ma) (Basho Room (Kakushigi Room)), view of original screens from Kyaku-den (Guest Hall) Room") Storage Hall, Interior: Hageyama-no-ma (Bare Mountains Room), view of original screens from Kyaku-den (Guest Hall)
Storage Hall, Interior: Hageyama-no-ma (Bare Mountains Room), view of original screens from Kyaku-den (Guest Hall), Interior: Duck Room") Kyaku-den (Guest Hall), Interior: Kamo-no-ma (Duck Room)
Kyaku-den (Guest Hall), Interior: Kamo-no-ma (Duck Room), Interior: Monkey Room") Kyaku-den (Guest Hall), Interior: Saru-no-ma (Monkey Room)
Kyaku-den (Guest Hall), Interior: Saru-no-ma (Monkey Room), Interior: Farming Room") Kyaku-den (Guest Hall), Interior: Nōgyō-no-ma (Agriculture Room)
Kyaku-den (Guest Hall), Interior: Nōgyō-no-ma (Agriculture Room), Interior: Peacock Room") Kyaku-den (Guest Hall), Interior: Kujaku-no-ma (Peacock Room)
Kyaku-den (Guest Hall), Interior: Kujaku-no-ma (Peacock Room), Interior: Peacock Room") Kyaku-den (Guest Hall), Interior: Kujaku-no-ma (Peacock Room)
Kyaku-den (Guest Hall), Interior: Kujaku-no-ma (Peacock Room), Interior: Kakushigi (Basho) Room") Kyaku-den (Guest Hall), Interior: Bashō-no-ma (Kakushigi-no-ma) (Basho Room (Kakushigi Room))
Kyaku-den (Guest Hall), Interior: Bashō-no-ma (Kakushigi-no-ma) (Basho Room (Kakushigi Room)), Interior: Bare Mountain Room") Kyaku-den (Guest Hall), Interior: Hageyama-no-ma (Bare Mountains Room)
Kyaku-den (Guest Hall), Interior: Hageyama-no-ma (Bare Mountains Room), Interior: Landscape Room") Kyaku-den (Guest Hall), Interior: Sansui-no-ma (Landscape Room)
Kyaku-den (Guest Hall), Interior: Sansui-no-ma (Landscape Room), Interior: Landscape Room") Kyaku-den (Guest Hall), Interior: Sansui-no-ma (Landscape Room)
Kyaku-den (Guest Hall), Interior: Sansui-no-ma (Landscape Room), Interior: Wisteria Room") Kyaku-den (Guest Hall), Interior: Fuji-no-ma (Wisteria Room)
Kyaku-den (Guest Hall), Interior: Fuji-no-ma (Wisteria Room), Interior: Carp Room") Kyaku-den (Guest Hall), Interior: Koi-no-ma (Carp Room)
Kyaku-den (Guest Hall), Interior: Koi-no-ma (Carp Room), Interior: Puppy Room") Kyaku-den (Guest Hall), Interior: Gōzu-no-ma (Puppy Room)
Kyaku-den (Guest Hall), Interior: Gōzu-no-ma (Puppy Room), Interior: Hermit Room") Kyaku-den (Guest Hall), Interior: Sennin-no-ma (Immortals/Hermit Room)
Kyaku-den (Guest Hall), Interior: Sennin-no-ma (Immortals/Hermit Room), Interior: Messenger Room") Kyaku-den (Guest Hall), Interior: Shisha-no-ma (Envoys Room)
Kyaku-den (Guest Hall), Interior: Shisha-no-ma (Envoys Room) Exterior: Kyaku-den (Guest Hall)
 Interior: Kannon-den (Silver Pavilion) second floor, Chōonkaku (Wave Sound Pavilion), view of Statue of Seated Bodhisattva Kannon
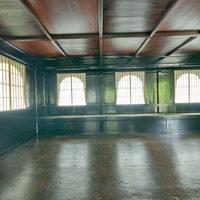 Interior: Kannon-den (Silver Pavilion) second floor, Chōonkaku (Wave Sound Pavilion), view of Statue of Seated Bodhisattva Kannon
 Exterior: View of Garden from Kannon-den (Silver Pavilion) second floor, Chōonkaku (Wave Sound Pavilion)
 Interior: View of Garden from Kannon-den (Silver Pavilion) first floor, Shinkū-den (Empty Mind Hall)
 Exterior: View of Garden from Kannon-den (Silver Pavilion) first floor, Shinkū-den (Empty Mind Hall)
 Interior: Kannon-den (Silver Pavilion) first floor, Shinkū-den (Empty Mind Hall)
 Exterior: View of Garden from Hōjō
 Exterior: Between Sanjūnotō (Three-Story Pagoda) and Zuigu-dō (Jishin-in)
 Exterior: Between Sanjūnotō (Three-Story Pagoda) and Zuigu-dō (Jishin-in)
") Exterior: Path between Sanjūnotō (Three-Story Pagoda) and Sai-mon (West Gate)
Exterior: Path between Sanjūnotō (Three-Story Pagoda) and Sai-mon (West Gate)") Exterior: Front of Kyō-dō (Hall of Writings)
Exterior: Front of Kyō-dō (Hall of Writings)") Exterior: Front of Tamura-dō (Founder's Hall)
Exterior: Front of Tamura-dō (Founder's Hall) Exterior: Between Hon-dō and Shaka-dō
 Exterior: Front of Shaka-dō
 Exterior: Between Shaka-dō and Amida-dō
 Exterior: Front of Amida-dō
 Exterior: Front of Oku-no-in, view of Hon-dō
") Exterior: Near the Hokuen-dō (Northern Octagonal Hall)
Exterior: Near the Hokuen-dō (Northern Octagonal Hall)") Exterior: Near the Hokuen-dō (Northern Octagonal Hall)
Exterior: Near the Hokuen-dō (Northern Octagonal Hall)") Exterior: Near the Hokuen-dō (Northern Octagonal Hall)
Exterior: Near the Hokuen-dō (Northern Octagonal Hall)") Exterior: Near the Nanen-dō (Southern Octagonal Hall)
Exterior: Near the Nanen-dō (Southern Octagonal Hall)") Exterior: Near the Nanen-dō (Southern Octagonal Hall)
Exterior: Near the Nanen-dō (Southern Octagonal Hall)") Exterior: Near the Gojūnotō (Five Storied Pagoda)
Exterior: Near the Gojūnotō (Five Storied Pagoda)") Exterior: Near the Gojūnotō (Five Storied Pagoda)
Exterior: Near the Gojūnotō (Five Storied Pagoda) and Tokondo (Eastern Golden Hall)") Exterior: Near the Gojūnotō (Five Storied Pagoda) and Tōkon-dō (Eastern Golden Hall)
Exterior: Near the Gojūnotō (Five Storied Pagoda) and Tōkon-dō (Eastern Golden Hall)") Exterior: Near the Gojūnotō (Five Storied Pagoda)
Exterior: Near the Gojūnotō (Five Storied Pagoda)") Exterior: Near the Gojūnotō (Five Storied Pagoda) and Tōkon-dō (Eastern Golden Hall)
Exterior: Near the Gojūnotō (Five Storied Pagoda) and Tōkon-dō (Eastern Golden Hall) and Tokondo (Eastern Golden Hall)") Exterior: Near the Gojūnotō (Five Storied Pagoda) and Tōkon-dō (Eastern Golden Hall)
Exterior: Near the Gojūnotō (Five Storied Pagoda) and Tōkon-dō (Eastern Golden Hall) and Nanendo (Southern Octagonal Hall)") Exterior: Path between the Gojūnotō (Five Storied Pagoda) and Nanen-dō (Southern Octagonal Hall)
Exterior: Path between the Gojūnotō (Five Storied Pagoda) and Nanen-dō (Southern Octagonal Hall)") Exterior: Front of Kon-dō (Golden Hall)
Exterior: Front of Kon-dō (Golden Hall) with view of Five-story Pagoda") Exterior: Near Kon-dō (Golden Hall) with view of Gojūnotō
Exterior: Near Kon-dō (Golden Hall) with view of Gojūnotō") Exterior: Hon-dō (first Main Hall)
Exterior: Hon-dō (first Main Hall) Exterior: Stairs to Gojūnotō (Five-story Pagoda)
 Exterior: Gojūnotō (Five-story Pagoda)
") Interior: Kon-dō (Golden Hall)
Interior: Kon-dō (Golden Hall)") Interior: Kon-dō (Golden Hall)
Interior: Kon-dō (Golden Hall)") Interior: Kon-dō (Golden Hall)
Interior: Kon-dō (Golden Hall)") Interior: Kon-dō (Golden Hall)
Interior: Kon-dō (Golden Hall) Interior: Miroku-dō (Maitreya Hall)
 Interior: Miroku-dō (Maitreya Hall)
") Interior: Hon-dō (first Main Hall)
Interior: Hon-dō (first Main Hall)") Interior: Hon-dō (first Main Hall)
Interior: Hon-dō (first Main Hall)") Interior: Oku-no-in (Sutra Hall)
Interior: Oku-no-in (Sutra Hall)") Exterior: Oku-no-in (Sutra Hall)
Exterior: Oku-no-in (Sutra Hall)") Exterior: Supports under Oku-no-in (Sutra Hall)
Exterior: Supports under Oku-no-in (Sutra Hall) Exterior: Karesansui (Stone Garden) outside Hōjō (Main Hall)
 Exterior: Karesansui (Stone Garden) outside Hōjō (Main Hall)
 Exterior: Karesansui (Stone Garden) outside Hōjō (Main Hall)
 Exterior: Karesansui (Stone Garden) outside Hōjō (Main Hall)
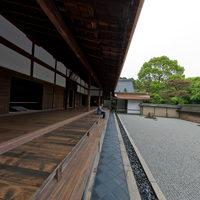 Exterior: Karesansui (Stone Garden) outside Hōjō (Main Hall)
 Hōjō (Main Hall), Interior: View of fusuma-e by Kakuō Satsuki
 Exterior: Kaidan-in
 Exterior: Kaidan-in
 Exterior: Kaidan-in
 Exterior: Kaidan-in
 Exterior: Near Sashizu-dō
 Exterior: Between Daibutsu-den and Chu-mon
 Exterior: Between Daibutsu-den and Chu-mon
 Exterior: Front of Daibutsu-den
 Exterior: Front of Daibutsu-den
 Exterior: Front of Daibutsu-den
 Exterior: Front of Daibutsu-den
 Interior: Daibutsu-den
 Exterior: Between Hokke-dō (Sangatsu-dō) and Shigatsu-dō (Sanmai-dō)
 Exterior: Between Hokke-dō (Sangatsu-dō) and Shigatsu-dō (Sanmai-dō)
 Exterior: Between Akai-ya and Chūshō-in
 Exterior: Area between Shōrō (Bell Tower), Shunjō-dō, and Nenbutsu-dō
 Exterior: Area between Shōrō (Bell Tower), Shunjō-dō, and Nenbutsu-dō
") Exterior: View from Kō-dō (Lecture Hall)
Exterior: View from Kō-dō (Lecture Hall)") Exterior: View from Kō-dō (Lecture Hall)
Exterior: View from Kō-dō (Lecture Hall) Exterior: View from Kon-dō (Main Hall)
 Exterior: View of Complex
 Exterior: View of Complex
 Exterior: View of Complex
 Exterior: View of Complex
 Exterior: View of Complex
 Exterior: View of Complex
 Exterior: View of Complex
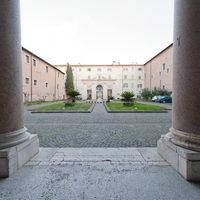 Exterior: View from Loggia
 Interior: View from Chapel of Saint Sebastian, south of nave
 Caldarium
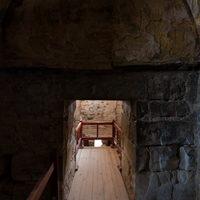 Tepidarium
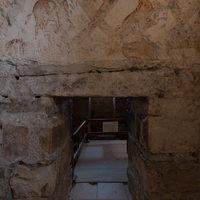 Apodyterium
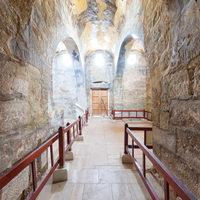 Main Hall, Southern Vaulted Alcove
 Main Hall
 Eastern End of Main Hall
 Interior: Choir
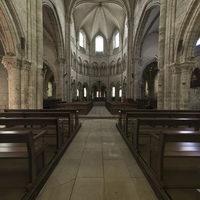 Interior: Nave
 Interior: South Ambulatory
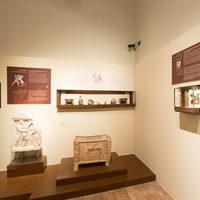 Interior: Boeotian Myth Gallery
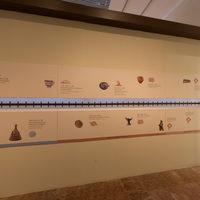 Interior: Boeotian Myth Gallery
 Interior: Boeotian Myth Gallery
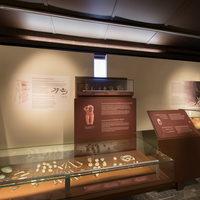 Interior: Stone Age Gallery
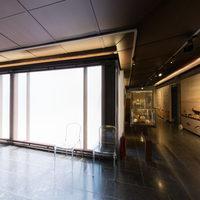 Interior: Stone Age Gallery
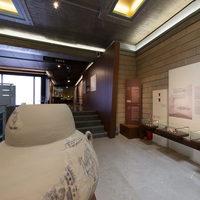 Interior: Bronze Age Gallery
 Interior: Mycenaean Gallery
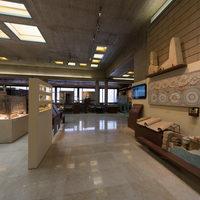 Interior: Mycenaean Gallery
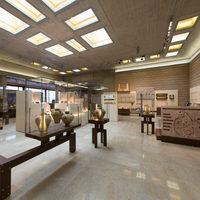 Interior: Mycenaean Gallery
 Interior: Mycenaean Gallery
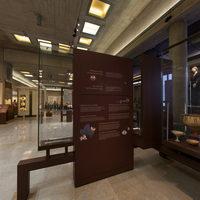 Interior: Mycenaean Gallery
 Interior: Mycenaean Gallery
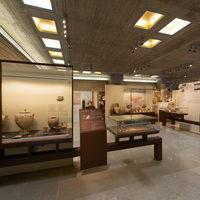 Interior: Geometric Art Gallery
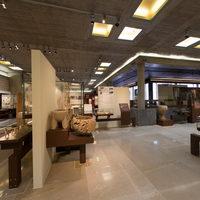 Interior: Geometric Art Gallery
 Interior: Archaic Art Gallery
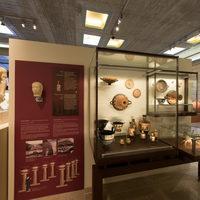 Interior: Archaic Art Gallery
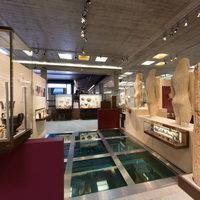 Interior: Archaic Art Gallery
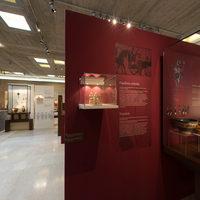 Interior: Archaic Art Gallery
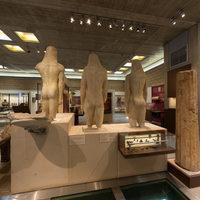 Interior: Archaic Art Gallery
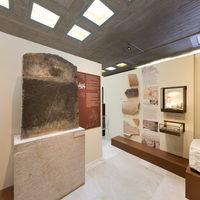 Interior: Classical Art Gallery
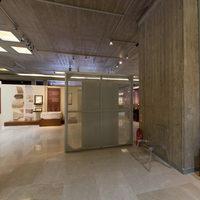 Interior: Classical Art Gallery
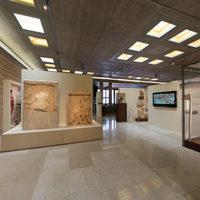 Interior: Classical Art Gallery
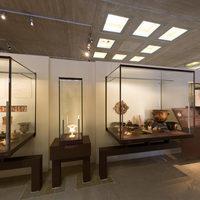 Interior: Classical Art Gallery
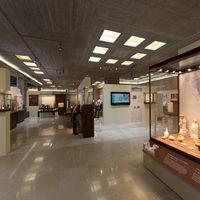 Interior: Classical Art Gallery
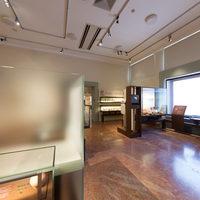 Interior: Hellenistic Art Gallery
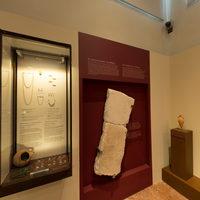 Interior: Hellenistic Art Gallery
 Interior: Hellenistic Art Gallery
 Interior: Roman Art Gallery
 Interior: Roman Art Gallery
 Interior: Roman Art Gallery
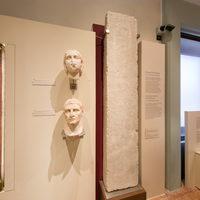 Interior: Roman Art Gallery
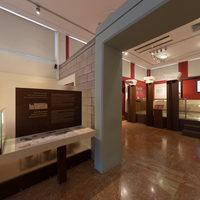 Interior: Byzantine Art Gallery
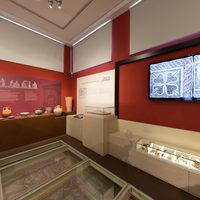 Interior: Byzantine Art Gallery
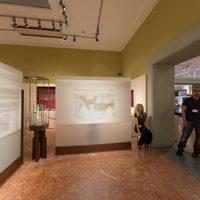 Interior: Byzantine Art Gallery
 Interior: Byzantine Art Gallery
 Interior: Byzantine Art Gallery
 Interior: Byzantine Art Gallery
 Interior: Byzantine Art Gallery
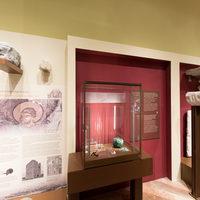 Interior: Byzantine Art Gallery
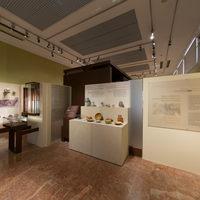 Interior: Ottoman Art Gallery
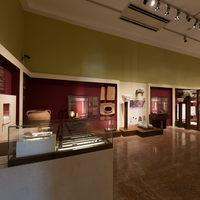 Interior: Ottoman Art Gallery
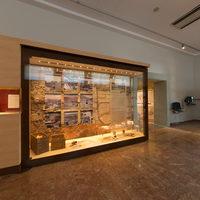 Interior: Entrance Hall
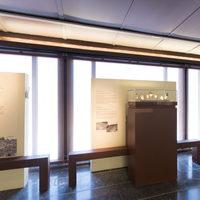 Interior: Boeotian Myths & Drama Hallway
 Interior: Boeotian Myths & Drama Hallway
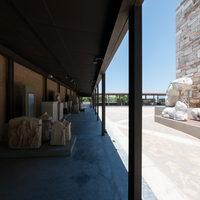 Exterior: Courtyard Marble Collection
 Exterior: Courtyard Marble Collection
 Exterior: Courtyard Marble Collection
 Exterior: Courtyard Marble Collection
 Exterior: Courtyard Marble Collection
 Exterior: Courtyard Marble Collection
 Exterior: Medieval Tower
 Exterior: Medieval Tower
 Exterior: Entrance
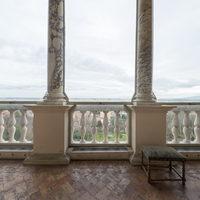 Loggia
 Interior: Caldarium
 Interior: Bathroom
 View from center of east aisle, at central chapel
 View from choir, east of rood screen
 View from eastern end of choir
 View from eastern end of choir, south of tomb of Philibert II of Savoy
 View from Chapelle de la Vierge, northeastern corner of church
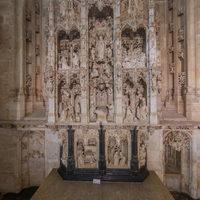 View from Chapelle de la Vierge, in front of Altarpiece of the Seven Joys of the Virgin
 View from northeast ambulatory, between Chapelle de Madame and Chapelle de Gorrevod
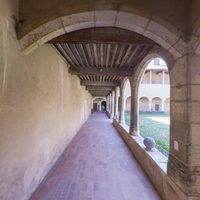 View under eastern arcade of Cloître des Commis
 View from eastern end of Cloître des Commis
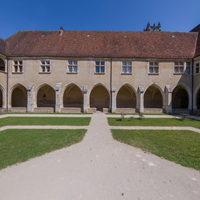 View from center of Cloître des Moines
 View from northeastern corner of Cloître des Moines
 View under arcade at northeastern corner of Cloître des Moines
 View under arcade at southeastern corner of Cloître des Hôtes
 View from southern side of Cloître des Hôtes
 View from antechamber of chapel in southeast corner of château
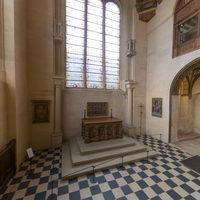 View from center of chapel in southeast corner of château
 View from northeast corner of chapel in southeast corner of château
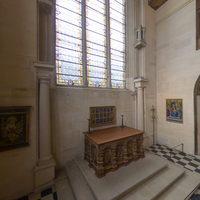 View along east side of chapel in southeast corner of château
 View from central southern aisle chapel
 View from chapel at east end of northern aisle
 View from south side of cloister
 View from eastern end of north aisle, at apse chapel
 View from eastern end of south aisle, at apse chapel
 View from south aisle, south of center-west side chapel
 View from southern side chapel
 View from western end of baptistery
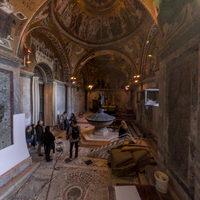 View from southwestern end of baptistery
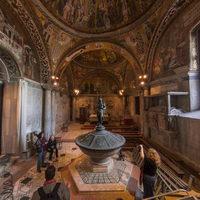 View from western area of baptistery, under arch
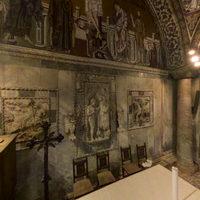 View from northeastern corner of baptistery
 View from eastern corner of baptistery
 View under eastern arch of baptistery
 View under central cupola of baptistery, next to baptismal font
 View from northeastern doorway of baptistery