Exterior: View from NW
Exterior: View from North (facade)
Exterior: View from North (facade)
Exterior: View from North (facade)
Exterior: View from NE
Exterior: View from East
Exterior: View from NW
Exterior: View from SW
Exterior: View from East
Interior: View of Museum Gallery
Exterior: View of Via Biberatica from upper level
Exterior: Overlooking Via Biberatica
Interior: View of Central Hall
Interior: View of Central Hall
Interior: View of Room off Main Hall
Interior: View of Room off Main Hall
Interior: View of Room off Main Hall
Interior: View of Room off Main Hall
Interior: View of Room off Main Hall
Exterior: View onto Via Biberatica and First-floor Shops
Exterior: View of Via Biberatica
Exterior: View of Via Biberatica and First-Floor Shops
Exterior: View of Via Biberatica and First-Floor Shops
Exterior: View of Via Biberatica
Exterior: View Overlooking Imperial Fora
Exterior: View onto Via Biberatica
Exterior: View onto Via Biberatica
Exterior: View to Milizie Tower
Exterior: View to Milizie Tower
Exterior: View to Milizie Tower
Exterior: View of Via delle Torre
Exterior: View of Milizie Tower
Exterior: View of Milizie Tower
Exterior: View of Milizie Tower
Exterior: View of Milizie Garden
Exterior: View of Stairs to Via delle Torre
Interior: View below Milizie Tower
Interior: View of museum room with statue of Aeneas Aschanius and Anchises from the Forum of Augustus
Interior: View of museum exhibition space showing statue of Aeneas Aschanius and Anchises from the Forum of Augustus
Interior: View of Museum (vaulted room)
Interior: View of museum room dedicated to the remains from the Forum of Augustus (Caryatids and shield devices)
Interior: View of museum room dedicated to the remains from the Forum of Augustus
Interior: View of museum room dedicated to the remains from the Forum of Augustus (summi viri)
Interior: View of museum room dedicated to the remains from the Forum of Augustus (summi viri)
Interior: View of museum room dedicated to the remains from the Forum of Augustus (the colossal statue)
Interior: View of museum room dedicated to the remains from the Forum of Augustus (the colossal statue)
Interior: View of museum room dedicated to the remains from the Forum of Augustus (the colossal statue)
Interior: View of museum room dedicated to the remains from the Forum of Augustus (the colossal statue)
Interior: View of museum exhibition space
Interior: View of museum exhibition space
Interior: View of Main Hall of Museum
Interior: View of Main Hall of Museum
Interior: View of Main Hall of Museum
Interior: View of Main Hall of Museum
Interior: View of Main Hall of Museum (North end)
Interior: View of Main Hall of Museum (North end)
Interior: View of museum room dedicated to Temple of Mars Ultor
Interior: View of museum room with model reconstruction of the Forum of Augustus
Interior: View of museum
Exterior: View from SE of Trajan’s Column
Exterior: View from South corner of Basilica Ulpia
Exterior: View from South of Trajan’s Column
Exterior: View from SE end of Basilica Ulpia
Exterior: View from SE end of Basilica Ulpia
Exterior: View from SE end of Basilica Ulpia
Exterior: View from South of Trajan’s Column
Exterior: View of Chiesa di Santa Maria di Loreto, Monument to Victor Emmanuel II, and the Forum of Trajan
Exterior: View from North
Exterior: View from North
Exterior: View from East of Basilica
Exterior: View from East of Basilica
Exterior: View from East of Basilica
Exterior: View of Vatican Obelisk
Exterior: View of Vatican Obelisk
Interior: Lower Church, Apse
Interior: Lower Church, Crossing
Interior: Lower Church, Eastern Nave Bay
Interior: Lower Church, North Transept
Exterior: Lower Church, Piazza
Interior: Lower Church, South Transept
Interior: Lower Church, Westernmost Nave Bay
Interior: Upper Church, Nave Bay
Interior: Upper Church, Nave Bay
Exterior: Upper Church, Piazza
Interior: Upper Church, Crossing
Interior: Upper Church, Apse
Interior: Upper Church, Nave Bay
Interior: Upper Church, Nave Bay
Interior: Upper Church, North Transept
Interior: Upper Church, South Transept
View of Kiva
View of Sacristy Storeroom
View from Center of Nave
View of Church Sanctuary and Altar
View of Southern Part of Nave
View of Baptistry, Marker 15
View of Church Portería
View of Exterior of Nave
View facing West
View from West Side, distant view of San Felipe de Neri Church
View from East Side, distant view of San Felipe de Neri Church
Exterior: View of Main Entrance and Sculpture Garden
Exterior: View from Center of Installation
Exterior: View facing Center of Installation
View of Big Kiva
View of Tyuonyi Pueblo (Marker 6)
View of Tyuonyi Pueblo (Between Markers 6 & 7)
View of Tyuonyi Pueblo (Marker 8)
View of Tyuonyi Pueblo (Marker 9)
View in front of Reconstructed Talus House (Marker 13)
View from Inside Talus House Cavate (Marker 11)
View of Talus House Cavate (Marker 13)
View from Inside Talus House Cavate (Marker 14)
View from Inside Talus House Cavate (Marker 14)
View from Inside Talus House Cavate (Marker 14, Central Room)
View of Talus House Cavate (Marker 15)
View from Inside Talus House Cavate (Marker 15)
View of Long House (Marker 19)
View of Long House (Between Markers 19 & 20)
View of Long House (Marker 20)
View of Long House (Between Markers 20 & 21)
View of Long House (Marker 21)
View of Long House (Marker 21)
View Near Marker 3
View at Marker 4, Lookout Point
View at Marker 5
View of Interior of a Room on Eastern Edge
View of Remnants of a Wall in Southeast corner
View of Interior of Room in Southeast Corner
View at Western Trail Entrance
View of West Wing
View of Plaza
View of Northeastern Portion of Plaza
View of a Room in Northeast Corner
Interior of a Room in Northeast Corner
View Northern Wall from NE Corner
View From Center of Northern Wall
View of Exterior Northern Wall from Northwest Corner
View of the West Wing
View of Unexcavated Kiva, Marker 1
View at Marker 3
View Near Marker 2
View of Room Near Marker 2
View of Remains of Colonnade Wall
View of Great Kiva
View of Rooms near Marker 6
View of kivas Near Marker 7
View Between Marker 7 and Marker 8
View at Marker 9 of “Kiva G Complex”
View of Exterior Northern Perimeter
View of Interior of Room Near Marker 9
View at Marker 10
View at Marker 11
View of Exterior Northeastern Perimeter
View of Talus Unit Structure
View of Western Portion of Talus Unit Structure
View from Trail Entrance
View of Core and Veneer Walls at Marker 1
View at Marker 2
Elevated View at Marker 4
View from Marker 5
View at Marker 6
View West of Marker 7
View North of Marker 8
View at Marker 8
View of Near Marker 8
View of Eastern Plaza
View of Great Kiva in Western Plaza
View of Southwestern Corner
View of Great Kiva
View at Marker 11
Interior of Room at Marker 12
Interior of Room at Marker 13
Interior of Room at Marker 14
Interior of Room at Marker 15
Interior of Room at Marker 16
Interior of Enclosed Room at Marker 17
Interior of Room at Marker 18
View at Trail Entrance Near Marker 1
View at Marker 3
View at Marker 4
View at Marker 5
View Near Marker 9
View South of Marker 10
View from Northern Antechamber of Great Kiva
View of Interior of Great Kiva
View from Southern Antechamber
View of Cross Section of Broken Wall Near Marker 4
Exterior: View of Stations of the Cross by Gib Singleton and Gazebo
Exterior: View of Madonna and Child Statue, Gazeebo and Northeast End of Church
Exterior: View of Front Courtyard
Exterior: View between Welcome Center and South Corner of Church
Exterior: View of Northwest Facade of Church
Interior: View of Southern Chapel
Interior: View of Nave from Southwest End of Church
Interior: View of Nave with Reredos from Altar
Interior: View of Nave and Altar from Center of Nave
Interior: View of Prayer Room with Discarded Crutches
View of Installation and Yale Park
Exterior: View of Wareroom
 Exterior: View from NW
") Exterior: View from North (facade)
Exterior: View from North (facade)") Exterior: View from North (facade)
Exterior: View from North (facade)") Exterior: View from North (facade)
Exterior: View from North (facade) Exterior: View from NE
 Exterior: View from East
 Exterior: View from NW
 Exterior: View from SW
 Exterior: View from East
 Interior: View of Museum Gallery
 Exterior: View of Via Biberatica from upper level
 Exterior: Overlooking Via Biberatica
 Interior: View of Central Hall
 Interior: View of Central Hall
 Interior: View of Room off Main Hall
 Interior: View of Room off Main Hall
 Interior: View of Room off Main Hall
 Interior: View of Room off Main Hall
 Interior: View of Room off Main Hall
 Exterior: View onto Via Biberatica and First-floor Shops
 Exterior: View of Via Biberatica
 Exterior: View of Via Biberatica and First-Floor Shops
 Exterior: View of Via Biberatica and First-Floor Shops
 Exterior: View of Via Biberatica
 Exterior: View Overlooking Imperial Fora
 Exterior: View onto Via Biberatica
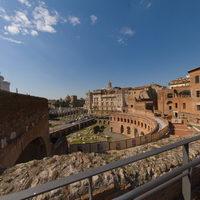 Exterior: View onto Via Biberatica
 Exterior: View to Milizie Tower
 Exterior: View to Milizie Tower
 Exterior: View to Milizie Tower
 Exterior: View of Via delle Torre
 Exterior: View of Milizie Tower
 Exterior: View of Milizie Tower
 Exterior: View of Milizie Tower
 Exterior: View of Milizie Garden
 Exterior: View of Stairs to Via delle Torre
 Interior: View below Milizie Tower
 Interior: View of museum room with statue of Aeneas Aschanius and Anchises from the Forum of Augustus
 Interior: View of museum exhibition space showing statue of Aeneas Aschanius and Anchises from the Forum of Augustus
") Interior: View of Museum (vaulted room)
Interior: View of Museum (vaulted room) Interior: View of museum room dedicated to the remains from the Forum of Augustus (Caryatids and shield devices)
 Interior: View of museum room dedicated to the remains from the Forum of Augustus
 Interior: View of museum room dedicated to the remains from the Forum of Augustus (summi viri)
 Interior: View of museum room dedicated to the remains from the Forum of Augustus (summi viri)
 Interior: View of museum room dedicated to the remains from the Forum of Augustus (the colossal statue)
 Interior: View of museum room dedicated to the remains from the Forum of Augustus (the colossal statue)
 Interior: View of museum room dedicated to the remains from the Forum of Augustus (the colossal statue)
 Interior: View of museum room dedicated to the remains from the Forum of Augustus (the colossal statue)
 Interior: View of museum exhibition space
 Interior: View of museum exhibition space
 Interior: View of Main Hall of Museum
 Interior: View of Main Hall of Museum
 Interior: View of Main Hall of Museum
 Interior: View of Main Hall of Museum
") Interior: View of Main Hall of Museum (North end)
Interior: View of Main Hall of Museum (North end)") Interior: View of Main Hall of Museum (North end)
Interior: View of Main Hall of Museum (North end) Interior: View of museum room dedicated to Temple of Mars Ultor
 Interior: View of museum room with model reconstruction of the Forum of Augustus
 Interior: View of museum
 Exterior: View from SE of Trajan’s Column
 Exterior: View from South corner of Basilica Ulpia
 Exterior: View from South of Trajan’s Column
 Exterior: View from SE end of Basilica Ulpia
 Exterior: View from SE end of Basilica Ulpia
 Exterior: View from SE end of Basilica Ulpia
 Exterior: View from South of Trajan’s Column
 Exterior: View of Chiesa di Santa Maria di Loreto, Monument to Victor Emmanuel II, and the Forum of Trajan
 Exterior: View from North
 Exterior: View from North
 Exterior: View from East of Basilica
 Exterior: View from East of Basilica
 Exterior: View from East of Basilica
 Exterior: View of Vatican Obelisk
 Exterior: View of Vatican Obelisk
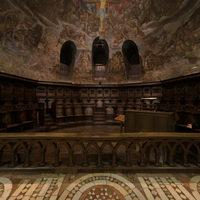 Interior: Lower Church, Apse
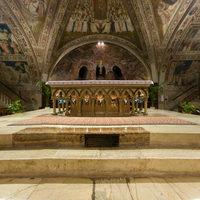 Interior: Lower Church, Crossing
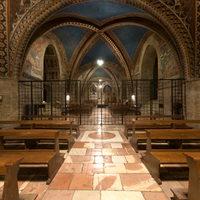 Interior: Lower Church, Eastern Nave Bay
 Interior: Lower Church, North Transept
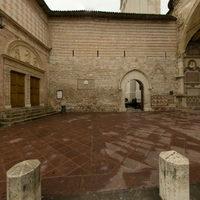 Exterior: Lower Church, Piazza
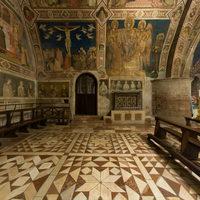 Interior: Lower Church, South Transept
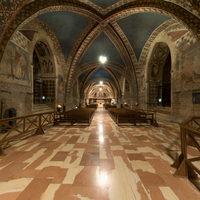 Interior: Lower Church, Westernmost Nave Bay
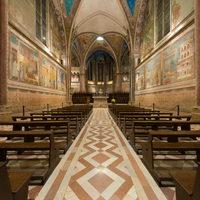 Interior: Upper Church, Nave Bay
 Interior: Upper Church, Nave Bay
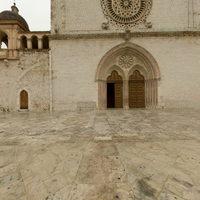 Exterior: Upper Church, Piazza
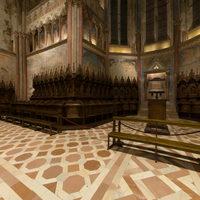 Interior: Upper Church, Crossing
 Interior: Upper Church, Apse
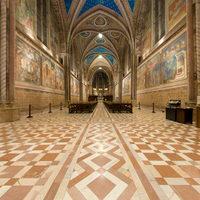 Interior: Upper Church, Nave Bay
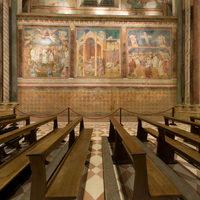 Interior: Upper Church, Nave Bay
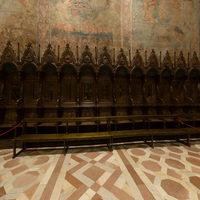 Interior: Upper Church, North Transept
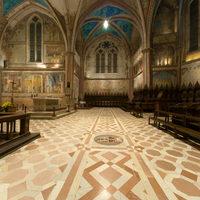 Interior: Upper Church, South Transept
 View of Kiva
 View of Sacristy Storeroom
 View from Center of Nave
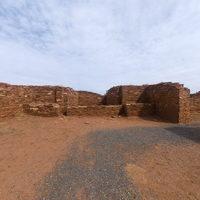 View of Church Sanctuary and Altar
 View of Southern Part of Nave
 View of Baptistry, Marker 15
 View of Church Portería
 View of Exterior of Nave
 View facing West
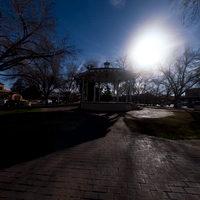 View from West Side, distant view of San Felipe de Neri Church
 View from East Side, distant view of San Felipe de Neri Church
 Exterior: View of Main Entrance and Sculpture Garden
 Exterior: View from Center of Installation
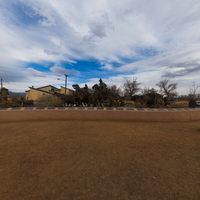 Exterior: View facing Center of Installation
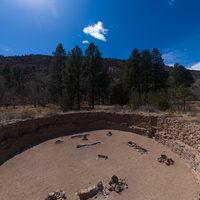 View of Big Kiva
") View of Tyuonyi Pueblo (Marker 6)
View of Tyuonyi Pueblo (Marker 6)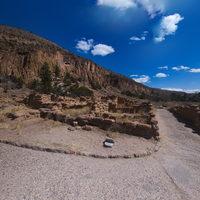 View of Tyuonyi Pueblo (Between Markers 6 & 7)
") View of Tyuonyi Pueblo (Marker 8)
View of Tyuonyi Pueblo (Marker 8)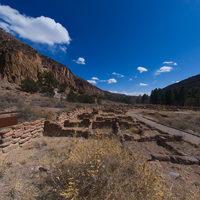 View of Tyuonyi Pueblo (Marker 9)
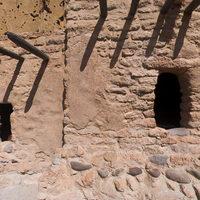 View in front of Reconstructed Talus House (Marker 13)
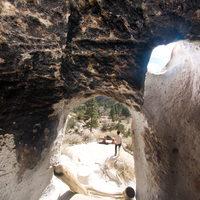 View from Inside Talus House Cavate (Marker 11)
") View of Talus House Cavate (Marker 13)
View of Talus House Cavate (Marker 13)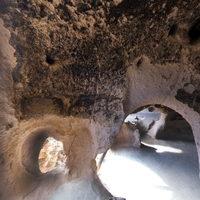 View from Inside Talus House Cavate (Marker 14)
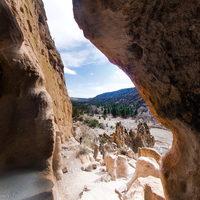 View from Inside Talus House Cavate (Marker 14)
") View from Inside Talus House Cavate (Marker 14, Central Room)
View from Inside Talus House Cavate (Marker 14, Central Room)") View of Talus House Cavate (Marker 15)
View of Talus House Cavate (Marker 15)") View from Inside Talus House Cavate (Marker 15)
View from Inside Talus House Cavate (Marker 15)") View of Long House (Marker 19)
View of Long House (Marker 19)") View of Long House (Between Markers 19 & 20)
View of Long House (Between Markers 19 & 20)") View of Long House (Marker 20)
View of Long House (Marker 20)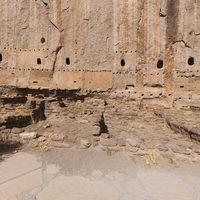 View of Long House (Between Markers 20 & 21)
") View of Long House (Marker 21)
View of Long House (Marker 21)") View of Long House (Marker 21)
View of Long House (Marker 21) View Near Marker 3
 View at Marker 4, Lookout Point
 View at Marker 5
 View of Interior of a Room on Eastern Edge
 View of Remnants of a Wall in Southeast corner
 View of Interior of Room in Southeast Corner
 View at Western Trail Entrance
 View of West Wing
 View of Plaza
 View of Northeastern Portion of Plaza
 View of a Room in Northeast Corner
 Interior of a Room in Northeast Corner
 View Northern Wall from NE Corner
 View From Center of Northern Wall
 View of Exterior Northern Wall from Northwest Corner
 View of the West Wing
 View of Unexcavated Kiva, Marker 1
 View at Marker 3
 View Near Marker 2
 View of Room Near Marker 2
 View of Remains of Colonnade Wall
 View of Great Kiva
 View of Rooms near Marker 6
 View of kivas Near Marker 7
 View Between Marker 7 and Marker 8
 View at Marker 9 of “Kiva G Complex”
 View of Exterior Northern Perimeter
 View of Interior of Room Near Marker 9
 View at Marker 10
 View at Marker 11
 View of Exterior Northeastern Perimeter
 View of Talus Unit Structure
 View of Western Portion of Talus Unit Structure
 View from Trail Entrance
 View of Core and Veneer Walls at Marker 1
 View at Marker 2
 Elevated View at Marker 4
 View from Marker 5
 View at Marker 6
 View West of Marker 7
 View North of Marker 8
 View at Marker 8
 View of Near Marker 8
 View of Eastern Plaza
 View of Great Kiva in Western Plaza
 View of Southwestern Corner
 View of Great Kiva
 View at Marker 11
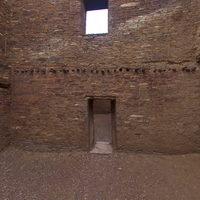 Interior of Room at Marker 12
 Interior of Room at Marker 13
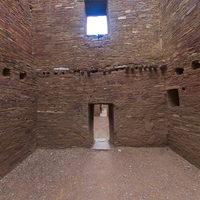 Interior of Room at Marker 14
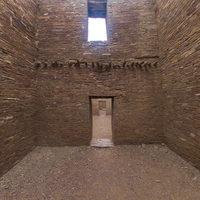 Interior of Room at Marker 15
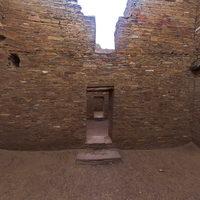 Interior of Room at Marker 16
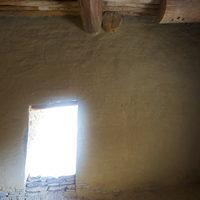 Interior of Enclosed Room at Marker 17
 Interior of Room at Marker 18
 View at Trail Entrance Near Marker 1
 View at Marker 3
 View at Marker 4
 View at Marker 5
 View Near Marker 9
 View South of Marker 10
 View from Northern Antechamber of Great Kiva
 View of Interior of Great Kiva
 View from Southern Antechamber
 View of Cross Section of Broken Wall Near Marker 4
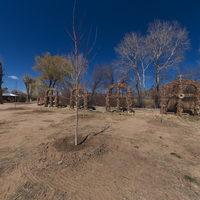 Exterior: View of Stations of the Cross by Gib Singleton and Gazebo
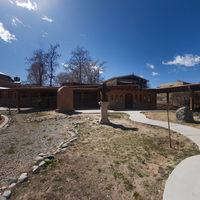 Exterior: View of Madonna and Child Statue, Gazeebo and Northeast End of Church
 Exterior: View of Front Courtyard
 Exterior: View between Welcome Center and South Corner of Church
 Exterior: View of Northwest Facade of Church
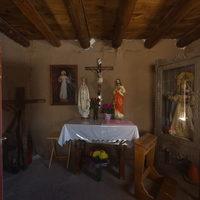 Interior: View of Southern Chapel
 Interior: View of Nave from Southwest End of Church
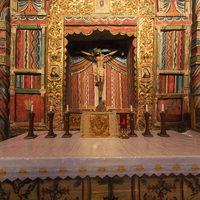 Interior: View of Nave with Reredos from Altar
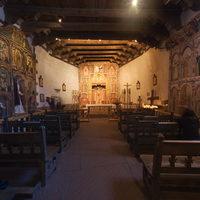 Interior: View of Nave and Altar from Center of Nave
 Interior: View of Prayer Room with Discarded Crutches
 View of Installation and Yale Park
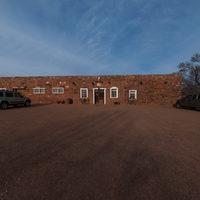 Exterior: View of Wareroom