sculpture
References
Contains information from the J. Paul Getty Trust, Getty Research Institute – the Art & Architecture Thesaurus, the Getty Thesaurus of Geographic Names, the Union List of Artist Names, the Cultural Objects Name Authority, and/or the Getty Iconography Authority – which is made available under the ODC Attribution License.
View on the Getty Vocabularies.
View on the Getty Vocabularies.
 Exterior: North Colonnade
 Exterior: North Colonnade, Basilica in the background
 Exterior: Colonnade, Obelisk Elevation
 Exterior: North Fountain
 Exterior: End of South Colonnade Viewed from entrance to Piazza
 Exterior: Saint Peter's Square, Basilica on the Left
 Exterior: Equestrian Statue of Constantine from the Portico
 Exterior: View of the Square from the steps of Saint Peter's Basilica
 Interior: View looking towards the Monument to Christina of Sweden
 Interior: View looking towards the Monument to Christina of Sweden
 Interior: South Nave
 Interior: Looking Southeast, View of sculptures of Autorità ecclesiastica and Giustizia divina
 Interior: South Nave
 Interior: Looking towards the Presentation Chapel
 Interior: Nave looking East
 Interior: Nave looking Southeast
 Interior: View of the Crossing, Baldacchino di San Pietro
 Interior: Cathedra Petri, Apse
 Interior: Nave Looking Northeast
 Exterior: Dome
 Exterior: South Dome
 Exterior: South Dome
 Exterior: South Dome
 Exterior: Installation View
 Exterior: Installation View
 Exterior: Installation View
 Exterior: Installation View, Detail
 Exterior: Installation View, Detail
 Exterior: Installation View, Detail
 Exterior: Installation View, Detail
 Exterior: Installation View
 Exterior: Installation View
 Exterior: Installation View
 Exterior: Installation View
 Exterior: View of the Cortile della Pigna looking North
 Exterior: View of the Cortile della Pigna looking North
 Exterior: Installation View
 Exterior: Installation View
 Exterior: Installation View
 Exterior: Installation View from Below
 Exterior: Installation View from Below
 Exterior: Installation View from Below
 Exterior: Installation View from Below
 Exterior: Installation View from Stairs
 Exterior: Installation View from Stairs
 Interior: View from the Hall of Museo Profano towards the the Galleria dei Candelabri, Porphyry Columns with Statues of the Tetrarchs
 Interior: View from the Hall of Museo Profano towards the Galleria dei Candelabri, Porphyry Columns with Statues of the Tetrarchs
 Interior: View of one of the Porphyry Columns with Statues of the Tetrarchs in the Galleria dei Candelabri in the Vatican Museum
 Interior: Installation View
 Interior: Installation View
 Interior: Wall Fresco, Bookcase
 Exterior: Obelisk Base
 Exterior: Obelisk Base
 Exterior: Statua di San Paolo, Frontal view from East
 Exterior: Statua di San Pietro Frontal view, in front of the Basilica
 Detail: Statua di San Pietro
 Exterior: Statua di San Pietro Frontal view
 Detail: Base
 Exterior: Facade Detail, South Clock
 Exterior: South Clock Detail
 Exterior: South Clock Detail
 Exterior: South Clock Detail
 Detail: Corinthian Capital
 Detail: Small pediment
 Detail: Small niche
 Detail: Obelisk top
 Detail: Obelisk top
 Detail: Obelisk base
 Detail: Obelisk base
 and Paul (by Andrea Fucigna) on the North Colonnade of Saint Peter's Square") Exterior: North Colonnade, Constantinian Wing, San Giovanni (left) and San Paolo (right)
Exterior: North Colonnade, Constantinian Wing, San Giovanni (left) and San Paolo (right) Exterior: Installation View
 Detail: Apotheosis of Antoninus Pius and Faustina
 Detail: Apotheosis of Antoninus Pius and Faustina
 Detail: Apotheosis of Antoninus Pius and Faustina
 Detail: Apotheosis of Antoninus Pius and Faustina
 Detail: Apotheosis of Antoninus Pius and Faustina
 Detail: Apotheosis of Antoninus Pius and Faustina
 Detail: Apotheosis of Antoninus Pius and Faustina
 Detail: Apotheosis of Antoninus Pius and Faustina
 Detail: Apotheosis of Antoninus Pius and Faustina
 Detail: Apotheosis of Antoninus Pius and Faustina
 Detail: Apotheosis of Antoninus Pius and Faustina
 Detail: Apotheosis of Antoninus Pius and Faustina
 Detail: Apotheosis of Antoninus Pius and Faustina
 Detail: Apotheosis of Antoninus Pius and Faustina
 Detail: Apotheosis of Antoninus Pius and Faustina
 Detail: Apotheosis of Antoninus Pius and Faustina
 Detail: Apotheosis of Antoninus Pius and Faustina
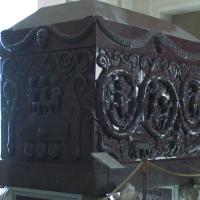 Interior: Installation View
 Interior: Installation View
 Interior: Installation View
 Interior: Installation View
 Interior: Installation View
 Interior: Detail of Bookcase
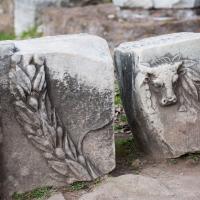 View of Fragments of Carved Ornament with a Garland and Cow Head
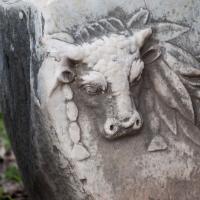 View of Fragments of Carved Ornament with a Garland and Cow Head
 View of a Fragment of Entablature
 View of Carved Fragments that look to be a Capital and Architrave
 View of a Carved Fragment that looks to be a coffered Ceiling
 View of the remains of the Temple of Vesta
 View of a Headless Statue of a Vestal Virgin
 View of a Carved Fragment
 View of a Statue of a Vestal Virgin on an Inscribed Base
 View of a Fragment of a Column
 View of a headless Statue of a Vestal Virgin
 View of an Inscribed Statue Base of a Vestal Virgin with Fragments of her feet
 View of the Courtyard of the House of the Vestal Virgins
 View of the Courtyard of the House of the Vestal Virgins
 View of Fragmentary Entablature in the Atrium Vestae
 View of a Statue Base in the Atrium Vestae
 View of the remains of the Temple of Vesta
 View of the Courtyard of the House of the Vestal Virgins looking towards the Palatine Hill
 View of the Courtyard of the House of the Vestal Virgins looking towards the Palatine Hill
 View of the Courtyard of the House of the Vestal Virgins looking towards the Palatine Hill
 View of the Courtyard of the House of the Vestal Virgins looking towards the Palatine Hill
 View of a Room in the House of the Vestal Virgins looking south
 View of Rooms in the House of the Vestal Virgins looking Northwest
 View of a Room in the House of the Vestal Virgins looking south
 View of the House of the Vestal Virgins looking Northwest
 View of the House of the Vestal Virgins
 View of a headless Statue of a Vestal Virgin
 View of an Inscribed Statue Base of a Vestal Virgin with Fragments of her feet
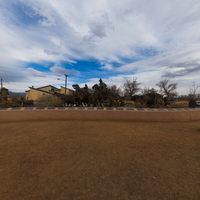 Exterior: View facing Center of Installation
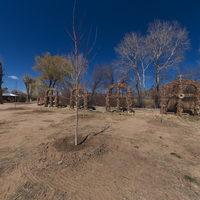 Exterior: View of Stations of the Cross by Gib Singleton and Gazebo
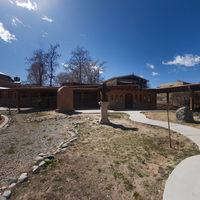 Exterior: View of Madonna and Child Statue, Gazeebo and Northeast End of Church
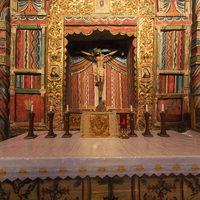 Interior: View of Nave with Reredos from Altar
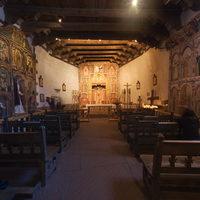 Interior: View of Nave and Altar from Center of Nave
 View of Installation and Yale Park
 View from center of installation
 Installation View from Cornell Mall, Southeast of Student Union Building
 View of Interior of Installation
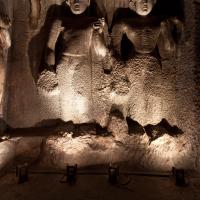 Interior: View of two unfinished standing Buddhas in Cave 4, Vihara
 Interior: Detail of an unfinished Buddha statue in Cave 4, Vihara
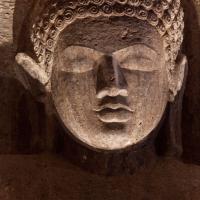 Interior: Detail of an unfinished Buddha statue in Cave 4, Vihara
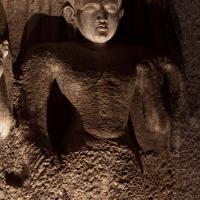 Interior: Detail of an unfinished Buddha statue in Cave 4, Vihara
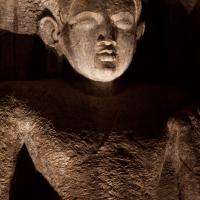 Interior: Detail of an unfinished Buddha statue in Cave 4, Vihara
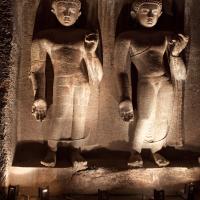 Interior: View of two finished standing Buddhas in Cave 4, Vihara
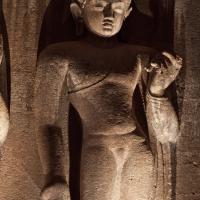 Interior: Detail of a finished Buddha statue in Cave 4, Vihara
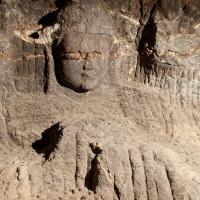 Interior: Cave 9, Barely begun Buddha image in sanctum
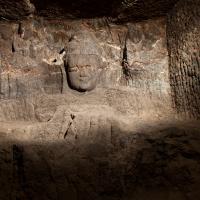 Interior: Cave 9, Barely begun Buddha image flanked by flying celestials in sanctum
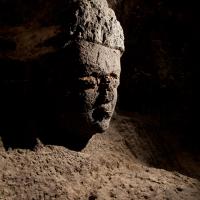 Interior: Cave 9, Barely begun Buddha image in sanctum
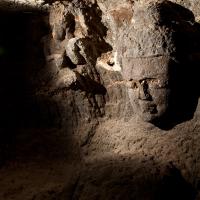 Interior: Cave 9, Barely begun Buddha image flanked by flying celestials in sanctum
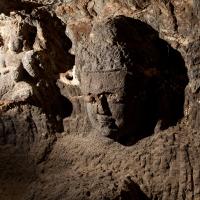 Interior: Cave 9, Barely begun Buddha image flanked by flying celestials in sanctum
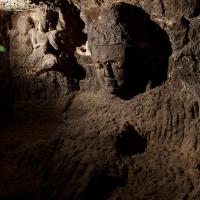 Interior: Cave 9, Barely begun Buddha image flanked by flying celestials in sanctum
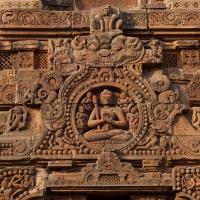 Exterior: Lakulisa image on the South wall of the vimana
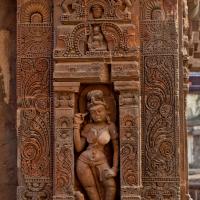 Exterior: North façade, detail of tower showing a surasundari
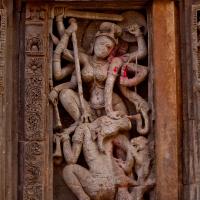 Exterior: North façade, detail of tower showing Durga as Mahishasuramardini
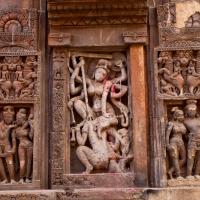 Exterior: North façade, detail of tower showing Durga as Mahishasuramardini and loving couples on either side
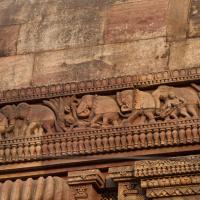 Exterior: West façade, elephant and rider procession
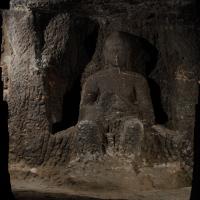 Interior: Cave 2, Largely unfinished Buddha on East wall
 Interior: Cave 2, Largely unfinished Buddha on East wall
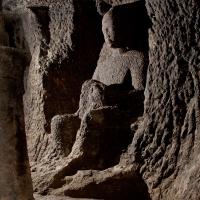 Interior: Cave 2, Largely unfinished Buddha on East wall
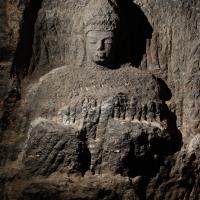 Interior: Cave 2, Barely begun image of Buddha on East Wall
 Interior: Cave 2, Barely begun image of Buddha on East Wall
 Interior: Cave 2, Barely begun image of Buddha on East Wall
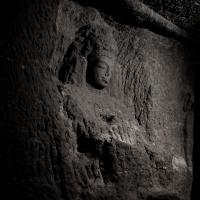 Interior: Cave 2, Barely begun image of Buddha on East Wall
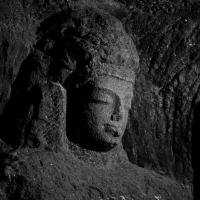 Interior: Cave 2, Barely begun image of Buddha on East Wall, detail
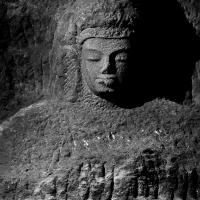 Interior: Cave 2, Barely begun image of Buddha on East Wall, detail
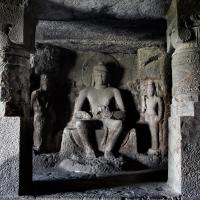 Interior: Cave 2, Mostly finished Buddha
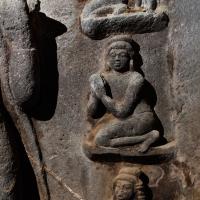 Interior: Cave 2
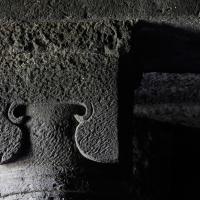 Interior: Cave 4, Detail of capital
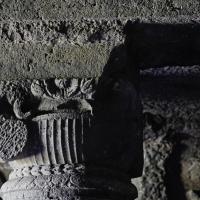 Interior: Cave 4, Detail of capital
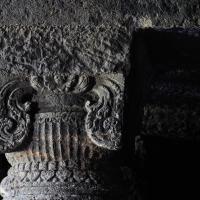 Interior: Cave 4, Detail of capital
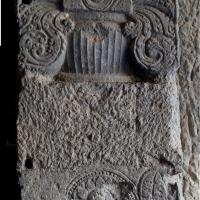 Interior: Cave 4, Detail of an unfinished column
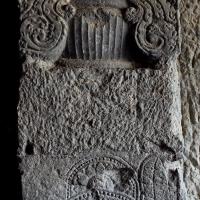 Interior: Cave 4, Detail of an unfinished column
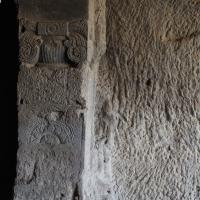 Interior: Cave 4, Unfinished column
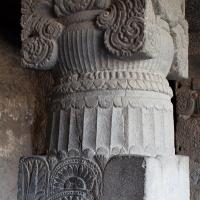 Interior: Cave 4, Detail of an unfinished column
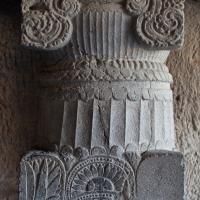 Interior: Cave 4, Detail of an unfinished column
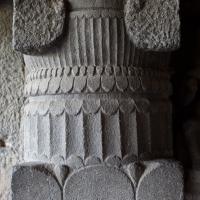 Interior: Cave 4, Detail of an unfinished column
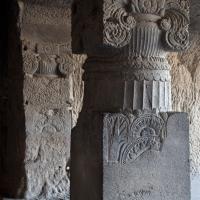 Interior: Cave 4, Columns
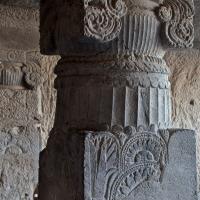 Interior: Cave 4, Columns, detail
 Interior: Cave 4
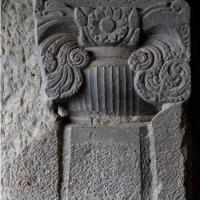 Interior: Cave 4
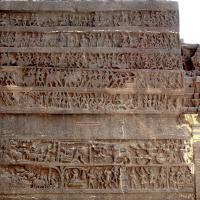 Exterior: The Mahabharata friezes on the Kailasa monolithic temple, Cave 16
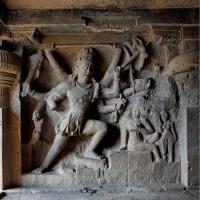 Interior: Dhumar Lena, Cave 29, West entanceway
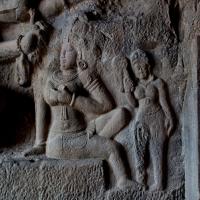 Interior: Dhumar Lena, Cave 29, West entanceway, detail
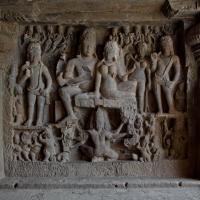 Interior: Dhumar Lena, Cave 29, West entranceway
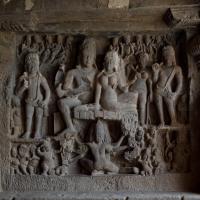 Interior: Dhumar Lena, Cave 29, West entranceway
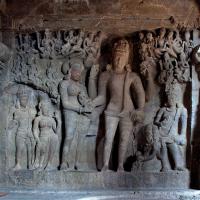 Interior: Dhumar Lena, Cave 29, South entranceway
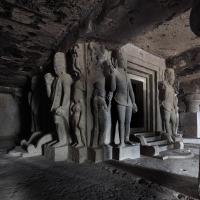 Interior: Finished sanctum in Dhumar Lena, Cave 29
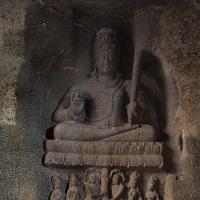 Interior: Dhumar Lena, Cave 29, North entranceway
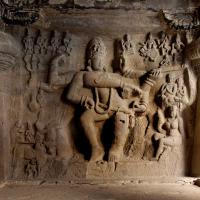 Interior: Dhumar Lena, Cave 29, North entranceway
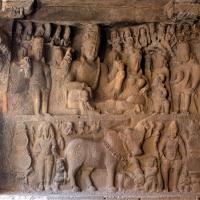 Interior: Dhumar Lena, Cave 29, South entranceway
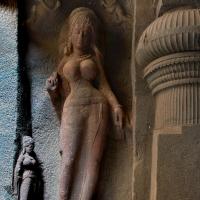 Interior: Dhumar Lena, Cave 29
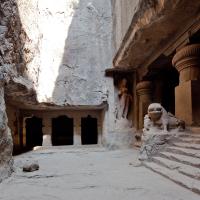 Exterior: Dhumar Lena, Cave 29
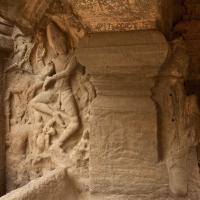 Interior: Chhota Kailasa, Cave 30
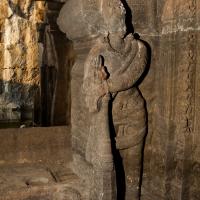 Interior: Dvarapala in Chhota Kailasa, Cave 30
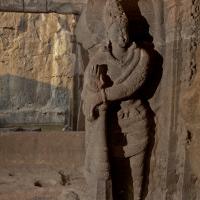 Interior: Dvarapala in Chhota Kailasa, Cave 30
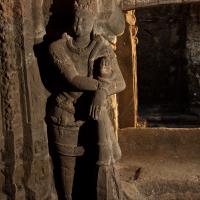 Interior: Dvarapala in Chhota Kailasa, Cave 30
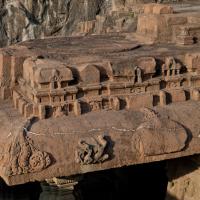 Exterior: Chhota Kailasa, Cave 30
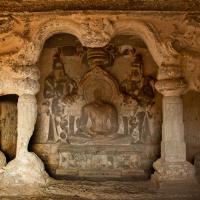 Exterior: Jina in shrine within shukanasa in Chhota Kailasa, Cave 30
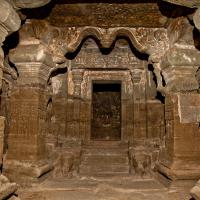 Interior: Jina shrine in Chhota Kailasa, Cave 30
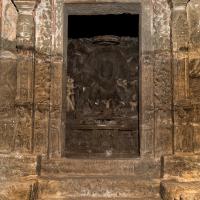 Interior: Jina shrine in Chhota Kailasa, Cave 30
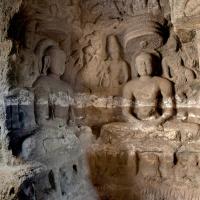 Interior: Jina shrine in Chhota Kailasa, Cave 30
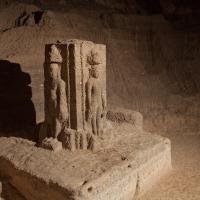 Interior: Cave 31, Quarry Cave, with view of the Sarvatobhadra Jain image in an incomplete space
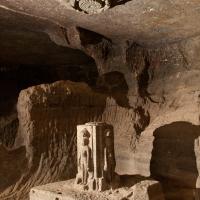 Interior: Cave 31, Quarry Cave, with view of the Sarvatobhadra Jain image in an incomplete space
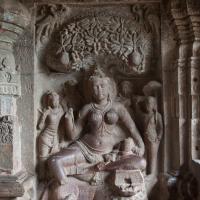 Interior: Yakshi Ambika in upper cave in Indra Sabha, Cave 32
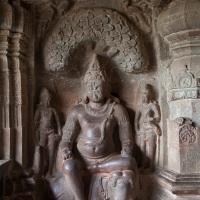 Interior: Yaksha Jambhala in upper cave in Indra Sabha, Cave 32
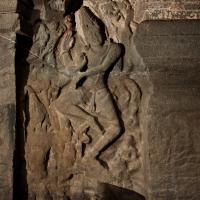 Interior: Dancing figure on temple face adjacent to porch in Chhota Kailasa, Cave 30
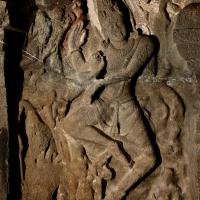 Interior: Dancing figure on temple face adjacent to porch in Chhota Kailasa, Cave 30, detail