Phnom Bakheng
View of a tier of shrines
Phnom Bakheng
View of shrines from the top of Phnom Bakheng looking downwards
Phnom Bakheng
Phnom Bakheng
Phnom Bakheng
View of shrines from the top of Phnom Bakheng looking downwards
Phnom Bakheng
Sculptural detail on the central shrine
Phnom Bakheng
View of central shrine
Phnom Bakheng
View of central shrine entrance
Phnom Bakheng
View of Angkor Wat from central shrine
Phnom Bakheng
View of entrance to Phnom Bakheng from top shrine
Phnom Bakheng
Sculptural detail on the entrance of the central shrine
Phnom Bakheng
Sculptural detail on the entrance of the central shrine
Phnom Bakheng
Detail of pillar base on the entrance of the central shrine
Phnom Bakheng
Detail of pillar base and sculptural detail on the entrance of the central shrine
Phnom Bakheng
Sculptural detail on the central shrine
Phnom Bakheng
Sculptural detail on the central shrine
Phnom Bakheng
Detail of a diety figure
Phnom Bakheng
Detail of a diety figure
Phnom Bakheng
Detail of a diety figure
Phnom Bakheng
View of relief above the door entrance of the central shrine
Phnom Bakheng
Detail of relief above the door entrance of the central shrine
Phnom Bakheng
Detail of the hand of diety figure
Phnom Bakheng
Detail of flying celestials on the central shrine
Phnom Bakheng
View showing shrine at ground level of the temple entrance
Phnom Bakheng
View of lion figures on the steps and a shrine at ground level of the temple entrance
Phnom Bakheng
View of a lion figure on the steps and shrines
Phnom Bakheng
View of temple
View of the temple gateway
Detail of inscribed stone near gateway
View from temple complex gateway facing away from it
View of temple complex gateway entrance
View of stepped tank at temple complex gateway
View of right tower at temple complex gateway
View of temple complex gateway façade
Detail of relief above the second doorway of temple complex gateway
View of temple complex gateway from inside
View of pillar relief inside temple gateway
Detail of pillar relief inside temple gateway
Celestian figure at temple gateway
Detail of relief in temple gateway
Detail of relief in temple gateway
View of a gallery in the temple gateway showing a freestanding diety figure
View of the main temple through the gateway
Side-view of temple gateway
Side-view of temple gateway
Side-view of temple gateway
Side-view of temple gateway
Side-view of temple gateway
View of main temple from the gateway
View of the north library within the temple complex
View of the north library within the temple complex
Detail of lions within Terrace of Honor
Distant view of the temple gateway from Terrace of Honor
Detail of lions within Terrace of Honor
View down the Battle of Lanka relief gallery
Detail of the Battle of Lanka relief gallery
Detail of the Battle of Lanka relief gallery
Detail of the Battle of Lanka relief gallery
Detail of the Battle of Lanka relief gallery
Detail of the Battle of Lanka relief gallery
Detail of ceiling relief
View down the Battle of Lanka relief gallery
View down the Battle of Lanka relief gallery
View down the Battle of Lanka relief gallery
View of a celestial figure down the Battle of Lanka relief gallery
Wall relief with a celestial figure and sculptural details
View within cruciform terraces
View within cruciform terraces
View within cruciform terraces
View within cruciform terraces
View within cruciform terraces
View of cruciform terraces from between round pillars
Gallery on the outer edge of cruciform terraces
View facing the enclosure of central shrine
View facing outwards from the central shrine showing window pillars
View facing outwards from the central shrine showing window pillars
View facing outwards from the central shrine
View of the wall surrounding central shrine from within
View of interior
View of cruciform terraces
View of cruciform terraces
View of cruciform terraces
View of cruciform terraces
View of cruciform terraces
Detail of lotus rosette on the ceiling between two columns
Detail of lotus rosette on the ceiling between two columns
View of steps to the entrance with lion
View of façade at the entrance to the temple complex
Architectural detail showing flying figures
View of gateway to the temple complex and south library
Comme des Garçons Aoyama
Exterior
Comme des Garçons Aoyama
Exterior
Comme des Garçons Aoyama
Exterior: Window Detail
Comme des Garçons Aoyama
Exterior: Window Detail
Comme des Garçons Aoyama
Exterior
Kakushigi-zu
Storage Hall, Interior: Bashō-no-ma (Kakushigi-no-ma) (Basho Room (Kakushigi Room)), Signature, view of original from Kyaku-den (Guest Hall)
Kakushigi-zu
Storage Hall, Interior: Bashō-no-ma (Kakushigi-no-ma) (Basho Room (Kakushigi Room)), Detail, view of original from Kyaku-den (Guest Hall)
Kakushigi-zu
Storage Hall, Interior: Bashō-no-ma (Kakushigi-no-ma) (Basho Room (Kakushigi Room)), Detail, view of original from Kyaku-den (Guest Hall)
Kakushigi-zu
Storage Hall, Interior: Bashō-no-ma (Kakushigi-no-ma) (Basho Room (Kakushigi Room)), Detail, view of original from Kyaku-den (Guest Hall)
Kakushigi-zu
Storage Hall, Interior: Bashō-no-ma (Kakushigi-no-ma) (Basho Room (Kakushigi Room)), Detail, view of original from Kyaku-den (Guest Hall)
Kakushigi-zu
Storage Hall, Interior: Bashō-no-ma (Kakushigi-no-ma) (Basho Room (Kakushigi Room)), Detail, view of original from Kyaku-den (Guest Hall)
Kakushigi-zu
Storage Hall, Interior: Bashō-no-ma (Kakushigi-no-ma) (Basho Room (Kakushigi Room)), Detail, view of original from Kyaku-den (Guest Hall)
Matsunikujaku-zu
Storage Hall, Interior: Kujaku-no-ma (Peacock Room), detail, view of original from Kyaku-den (Guest Hall)
Matsunikujaku-zu
Storage Hall, Interior: Kujaku-no-ma (Peacock Room), detail, view of original from Kyaku-den (Guest Hall)
Matsunikujaku-zu
Storage Hall, Interior: Kujaku-no-ma (Peacock Room), detail, view of original from Kyaku-den (Guest Hall)
Matsunikujaku-zu
Storage Hall, Interior: Kujaku-no-ma (Peacock Room), detail, view of original from Kyaku-den (Guest Hall)
Sansui-zu
Storage Hall, Interior: Sansui-no-ma (Landscape Room), view of original from Kyaku-den (Guest Hall)
Sansui-zu
Storage Hall, Interior: Sansui-no-ma (Landscape Room), view of original from Kyaku-den (Guest Hall)
Sansui-zu
Storage Hall, Interior: Sansui-no-ma (Landscape Room), view of the upper seat, view of original from Kyaku-den (Guest Hall)
Sansui-zu
Storage Hall, Interior: Sansui-no-ma (Landscape Room), view of the upper seat, view of original from Kyaku-den (Guest Hall)
Sansui-zu
Storage Hall, Interior: Sansui-no-ma (Landscape Room), view of original from Kyaku-den (Guest Hall)
Sansui-zu
Storage Hall, Interior: Sansui-no-ma (Landscape Room), view of original from Kyaku-den (Guest Hall)
Sansui-zu
Storage Hall, Interior: Sansui-no-ma (Landscape Room), view of original from Kyaku-den (Guest Hall)
Sansui-zu
Storage Hall, Interior: Sansui-no-ma (Landscape Room), view of original from Kyaku-den (Guest Hall)
Sansui-zu
Storage Hall, Interior: Sansui-no-ma (Landscape Room), view of original from Kyaku-den (Guest Hall)
Sansui-zu
Storage Hall, Interior: Sansui-no-ma (Landscape Room), view of original from Kyaku-den (Guest Hall)
Sansui-zu
Storage Hall, Interior: Sansui-no-ma (Landscape Room), view of original from Kyaku-den (Guest Hall)
Sansui-zu
Storage Hall, Interior: Sansui-no-ma (Landscape Room), view of original from Kyaku-den (Guest Hall)
Sansui-zu
Storage Hall, Interior: Sansui-no-ma (Landscape Room), view of the upper seat, view of original from Kyaku-den (Guest Hall)
Kakushigi-zu
Storage Hall, Interior: Bashō-no-ma (Kakushigi-no-ma) (Basho Room (Kakushigi Room)), view of original from Kyaku-den (Guest Hall)
Kakushigi-zu
Storage Hall, Interior: Bashō-no-ma (Kakushigi-no-ma) (Basho Room (Kakushigi Room)), view of original from Kyaku-den (Guest Hall)
Kakushigi-zu
Storage Hall, Interior: Bashō-no-ma (Kakushigi-no-ma) (Basho Room (Kakushigi Room)), view of original from Kyaku-den (Guest Hall)
Kakushigi-zu
Storage Hall, Interior: Bashō-no-ma (Kakushigi-no-ma) (Basho Room (Kakushigi Room)), view of original from Kyaku-den (Guest Hall)
Kakushigi-zu
Storage Hall, Interior: Bashō-no-ma (Kakushigi-no-ma) (Basho Room (Kakushigi Room)), view of original from Kyaku-den (Guest Hall)
Kakushigi-zu
Storage Hall, Interior: Bashō-no-ma (Kakushigi-no-ma) (Basho Room (Kakushigi Room)), view of original from Kyaku-den (Guest Hall)
Daijō-ji
Exterior: View of Gate Obscured by Trees
Daijō-ji
Exterior: Courtyard
Daijō-ji
Exterior: Gate
Gunen-zu
Kyaku-den (Guest Hall), Interior: Saru-no-ma (Monkey Room)
Gunen-zu
Kyaku-den (Guest Hall), Interior: Saru-no-ma (Monkey Room)
Gunen-zu
Kyaku-den (Guest Hall), Interior: Saru-no-ma (Monkey Room)
Baikayūkin-zu
Kyaku-den (Guest Hall), Interior: Kamo-no-ma (Duck Room)
Baikayūkin-zu
Kyaku-den (Guest Hall), Interior: Kamo-no-ma (Duck Room), Plum Blossoms and Swimming Birds, detail
Baikayūkin-zu
Kyaku-den (Guest Hall), Interior: Kamo-no-ma (Duck Room), Plum Blossoms and Swimming Birds, detail
Baikayūkin-zu
Kyaku-den (Guest Hall), Interior: Kamo-no-ma (Duck Room), Plum Blossoms and Swimming Birds, detail
Baikayūkin-zu
Kyaku-den (Guest Hall), Interior: Kamo-no-ma (Duck Room), Plum Blossoms and Swimming Birds, detail
Baikayūkin-zu
Kyaku-den (Guest Hall), Interior: Kamo-no-ma (Duck Room), Plum Blossoms and Swimming Birds, detail
Baikayūkin-zu
Kyaku-den (Guest Hall), Interior: Kamo-no-ma (Duck Room), detail, butterflies
Gunen-zu
Kyaku-den (Guest Hall), Interior: Saru-no-ma (Monkey Room), detail, signature of Rosetsu
Gunen-zu
Kyaku-den (Guest Hall), Interior: Saru-no-ma (Monkey Room), detail, trees
Gunen-zu
Kyaku-den (Guest Hall), Interior: Saru-no-ma (Monkey Room), detail, mountains
Gunen-zu
Kyaku-den (Guest Hall), Interior: Saru-no-ma (Monkey Room), detail, bamboo
Gunen-zu
Kyaku-den (Guest Hall), Interior: Saru-no-ma (Monkey Room), detail, monkey
Gunen-zu
Kyaku-den (Guest Hall), Interior: Saru-no-ma (Monkey Room), detail, Gunen-zu
Gunen-zu
Kyaku-den (Guest Hall), Interior: Saru-no-ma (Monkey Room), detail, baby monkey
Gunen-zu
Kyaku-den (Guest Hall), Interior: Saru-no-ma (Monkey Room), detail, Gunen-zu
Gunen-zu
Kyaku-den (Guest Hall), Interior: Saru-no-ma (Monkey Room), detail, Gunen-zu
Gunen-zu
Kyaku-den (Guest Hall), Interior: Saru-no-ma (Monkey Room), detail
Gunen-zu
Kyaku-den (Guest Hall), Interior: Saru-no-ma (Monkey Room), detail
Gunen-zu
Kyaku-den (Guest Hall), Interior: Saru-no-ma (Monkey Room), detail
Gunen-zu
Kyaku-den (Guest Hall), Interior: Saru-no-ma (Monkey Room), detail
Gunen-zu
Kyaku-den (Guest Hall), Interior: Saru-no-ma (Monkey Room), detail
Gunen-zu
Kyaku-den (Guest Hall), Interior: Saru-no-ma (Monkey Room), detail
Gunen-zu
Kyaku-den (Guest Hall), Interior: Saru-no-ma (Monkey Room), detail
Kakushigi-zu
Kyaku-den (Guest Hall), Interior: Bashō-no-ma (Kakushigi-no-ma) (Basho Room (Kakushigi Room))
Kakushigi-zu
Kyaku-den (Guest Hall), Interior: Bashō-no-ma (Kakushigi-no-ma) (Basho Room (Kakushigi Room))
Kakushigi-zu
Kyaku-den (Guest Hall), Interior: Bashō-no-ma (Kakushigi-no-ma) (Basho Room (Kakushigi Room))
Kakushigi-zu
Kyaku-den (Guest Hall), Interior: Bashō-no-ma (Kakushigi-no-ma) (Basho Room (Kakushigi Room))
Kakushigi-zu
Kyaku-den (Guest Hall), Interior: Bashō-no-ma (Kakushigi-no-ma) (Basho Room (Kakushigi Room))
Daijō-ji
Kyaku-den (Guest Hall), Interior: Hall
Matsunikujaku-zu
Kyaku-den (Guest Hall), Interior: View of Kujaku-no-ma (Peacock Room)
Matsunikujaku-zu
Kyaku-den (Guest Hall), Interior: View of Kujaku-no-ma (Peacock Room) and hallway
Shikikōsaku-zu
Kyaku-den (Guest Hall), Interior: Nōgyō-no-ma (Agriculture Room)
Sansui-zu
Kyaku-den (Guest Hall), Interior: Sansui-no-ma (Landscape Room)
Sansui-zu
Kyaku-den (Guest Hall), Interior: Sansui-no-ma (Landscape Room), view of the upper seat
Sansui-zu
Kyaku-den (Guest Hall), Interior: Sansui-no-ma (Landscape Room), view from upper seat
Sansui-zu
Kyaku-den (Guest Hall), Interior: Sansui-no-ma (Landscape Room), view of upper seat
Gunzanrochō-zu
Kyaku-den (Guest Hall), Interior: Hageyama-no-ma (Bare Mountains Room)
Gunzanrochō-zu
Kyaku-den (Guest Hall), Interior: Hageyama-no-ma (Bare Mountains Room)
Gunzanrochō-zu
Kyaku-den (Guest Hall), Interior: Hageyama-no-ma (Bare Mountains Room)
Gunzanrochō-zu
Kyaku-den (Guest Hall), Interior: Hageyama-no-ma (Bare Mountains Room)
Gunzanrochō-zu
Kyaku-den (Guest Hall), Interior: Hageyama-no-ma (Bare Mountains Room)
Gunzanrochō-zu
Kyaku-den (Guest Hall), Interior: Hageyama-no-ma (Bare Mountains Room)
Daijō-ji
Exterior: Courtyard
Daijō-ji
Exterior: Courtyard
Daijō-ji
Exterior: Courtyard
Daijō-ji
Exterior: Gate, Detail of Ceiling
Daijō-ji
Exterior: Courtyard
Daijō-ji
Exterior: Courtyard
Daijō-ji
Exterior: Bell
Daijō-ji
Exterior: Detail of Bell Structure
Daijō-ji
Exterior: Bell
Daijō-ji
Kyaku-den (Guest Hall), Exterior
Daijō-ji
Kyaku-den (Guest Hall), Exterior: Detail of Roof
Daijō-ji
Kyaku-den (Guest Hall), Exterior
Daijō-ji
Exterior
Daijō-ji
Exterior
Daijō-ji
Kyaku-den (Guest Hall), Exterior: Detail of Gable
Daijō-ji
Exterior
Daijō-ji
Exterior: Jizo Shrine
Daijō-ji
Exterior
Daijō-ji
Kyaku-den (Guest Hall), Exterior: Detail of Gable
Daijō-ji
Kyaku-den (Guest Hall), Exterior: Detail of Gable
Daijō-ji
Kyaku-den (Guest Hall), Exterior
Gunsen-zu
Kyaku-den (Guest Hall), Interior: Sennin-no-ma (Immortals/Hermit Room), detail
Gunsen-zu
Kyaku-den (Guest Hall), Interior: Sennin-no-ma (Immortals/Hermit Room), detail
Gunsen-zu
Kyaku-den (Guest Hall), Interior: Sennin-no-ma (Immortals/Hermit Room), detail
Gunsen-zu
Kyaku-den (Guest Hall), Interior: Sennin-no-ma (Immortals/Hermit Room)
Gunsen-zu
Kyaku-den (Guest Hall), Interior: Sennin-no-ma (Immortals/Hermit Room)
 Phnom BakhengView of a tier of shrines
 Phnom BakhengView of shrines from the top of Phnom Bakheng looking downwards
 Phnom Bakheng
 Phnom Bakheng
 Phnom BakhengView of shrines from the top of Phnom Bakheng looking downwards
 Phnom BakhengSculptural detail on the central shrine
 Phnom BakhengView of central shrine
 Phnom BakhengView of central shrine entrance
 Phnom BakhengView of Angkor Wat from central shrine
 Phnom BakhengView of entrance to Phnom Bakheng from top shrine
 Phnom BakhengSculptural detail on the entrance of the central shrine
 Phnom BakhengSculptural detail on the entrance of the central shrine
 Phnom BakhengDetail of pillar base on the entrance of the central shrine
 Phnom BakhengDetail of pillar base and sculptural detail on the entrance of the central shrine
 Phnom BakhengSculptural detail on the central shrine
 Phnom BakhengSculptural detail on the central shrine
 Phnom BakhengDetail of a diety figure
 Phnom BakhengDetail of a diety figure
 Phnom BakhengDetail of a diety figure
 Phnom BakhengView of relief above the door entrance of the central shrine
 Phnom BakhengDetail of relief above the door entrance of the central shrine
 Phnom BakhengDetail of the hand of diety figure
 Phnom BakhengDetail of flying celestials on the central shrine
 Phnom BakhengView showing shrine at ground level of the temple entrance
 Phnom BakhengView of lion figures on the steps and a shrine at ground level of the temple entrance
 Phnom BakhengView of a lion figure on the steps and shrines
 Phnom BakhengView of temple
 View of the temple gateway
 Detail of inscribed stone near gateway
 View from temple complex gateway facing away from it
 View of temple complex gateway entrance
 View of stepped tank at temple complex gateway
 View of right tower at temple complex gateway
 View of temple complex gateway façade
 Detail of relief above the second doorway of temple complex gateway
 View of temple complex gateway from inside
 View of pillar relief inside temple gateway
 Detail of pillar relief inside temple gateway
 Celestian figure at temple gateway
 Detail of relief in temple gateway
 Detail of relief in temple gateway
 View of a gallery in the temple gateway showing a freestanding diety figure
 View of the main temple through the gateway
 Side-view of temple gateway
 Side-view of temple gateway
 Side-view of temple gateway
 Side-view of temple gateway
 Side-view of temple gateway
 View of main temple from the gateway
 View of the north library within the temple complex
 View of the north library within the temple complex
 Detail of lions within Terrace of Honor
 Distant view of the temple gateway from Terrace of Honor
 Detail of lions within Terrace of Honor
 View down the Battle of Lanka relief gallery
 Detail of the Battle of Lanka relief gallery
 Detail of the Battle of Lanka relief gallery
 Detail of the Battle of Lanka relief gallery
 Detail of the Battle of Lanka relief gallery
 Detail of the Battle of Lanka relief gallery
 Detail of ceiling relief
 View down the Battle of Lanka relief gallery
 View down the Battle of Lanka relief gallery
 View down the Battle of Lanka relief gallery
 View of a celestial figure down the Battle of Lanka relief gallery
 Wall relief with a celestial figure and sculptural details
 View within cruciform terraces
 View within cruciform terraces
 View within cruciform terraces
 View within cruciform terraces
 View within cruciform terraces
 View of cruciform terraces from between round pillars
 Gallery on the outer edge of cruciform terraces
 View facing the enclosure of central shrine
 View facing outwards from the central shrine showing window pillars
 View facing outwards from the central shrine showing window pillars
 View facing outwards from the central shrine
 View of the wall surrounding central shrine from within
 View of interior
 View of cruciform terraces
 View of cruciform terraces
 View of cruciform terraces
 View of cruciform terraces
 View of cruciform terraces
 Detail of lotus rosette on the ceiling between two columns
 Detail of lotus rosette on the ceiling between two columns
 View of steps to the entrance with lion
 View of façade at the entrance to the temple complex
 Architectural detail showing flying figures
 View of gateway to the temple complex and south library
 Comme des Garçons AoyamaExterior
 Comme des Garçons AoyamaExterior
 Comme des Garçons AoyamaExterior: Window Detail
 Comme des Garçons AoyamaExterior: Window Detail
 Comme des Garçons AoyamaExterior
 Room, Signature") Kakushigi-zuStorage Hall, Interior: Bashō-no-ma (Kakushigi-no-ma) (Basho Room (Kakushigi Room)), Signature, view of original from Kyaku-den (Guest Hall)
Kakushigi-zuStorage Hall, Interior: Bashō-no-ma (Kakushigi-no-ma) (Basho Room (Kakushigi Room)), Signature, view of original from Kyaku-den (Guest Hall) Room, Detail") Kakushigi-zuStorage Hall, Interior: Bashō-no-ma (Kakushigi-no-ma) (Basho Room (Kakushigi Room)), Detail, view of original from Kyaku-den (Guest Hall)
Kakushigi-zuStorage Hall, Interior: Bashō-no-ma (Kakushigi-no-ma) (Basho Room (Kakushigi Room)), Detail, view of original from Kyaku-den (Guest Hall) Room, Detail") Kakushigi-zuStorage Hall, Interior: Bashō-no-ma (Kakushigi-no-ma) (Basho Room (Kakushigi Room)), Detail, view of original from Kyaku-den (Guest Hall)
Kakushigi-zuStorage Hall, Interior: Bashō-no-ma (Kakushigi-no-ma) (Basho Room (Kakushigi Room)), Detail, view of original from Kyaku-den (Guest Hall) Room, Detail") Kakushigi-zuStorage Hall, Interior: Bashō-no-ma (Kakushigi-no-ma) (Basho Room (Kakushigi Room)), Detail, view of original from Kyaku-den (Guest Hall)
Kakushigi-zuStorage Hall, Interior: Bashō-no-ma (Kakushigi-no-ma) (Basho Room (Kakushigi Room)), Detail, view of original from Kyaku-den (Guest Hall) Room, Detail") Kakushigi-zuStorage Hall, Interior: Bashō-no-ma (Kakushigi-no-ma) (Basho Room (Kakushigi Room)), Detail, view of original from Kyaku-den (Guest Hall)
Kakushigi-zuStorage Hall, Interior: Bashō-no-ma (Kakushigi-no-ma) (Basho Room (Kakushigi Room)), Detail, view of original from Kyaku-den (Guest Hall) Room, Detail") Kakushigi-zuStorage Hall, Interior: Bashō-no-ma (Kakushigi-no-ma) (Basho Room (Kakushigi Room)), Detail, view of original from Kyaku-den (Guest Hall)
Kakushigi-zuStorage Hall, Interior: Bashō-no-ma (Kakushigi-no-ma) (Basho Room (Kakushigi Room)), Detail, view of original from Kyaku-den (Guest Hall) Room, Detail") Kakushigi-zuStorage Hall, Interior: Bashō-no-ma (Kakushigi-no-ma) (Basho Room (Kakushigi Room)), Detail, view of original from Kyaku-den (Guest Hall)
Kakushigi-zuStorage Hall, Interior: Bashō-no-ma (Kakushigi-no-ma) (Basho Room (Kakushigi Room)), Detail, view of original from Kyaku-den (Guest Hall) Matsunikujaku-zuStorage Hall, Interior: Kujaku-no-ma (Peacock Room), detail, view of original from Kyaku-den (Guest Hall)
 Matsunikujaku-zuStorage Hall, Interior: Kujaku-no-ma (Peacock Room), detail, view of original from Kyaku-den (Guest Hall)
 Matsunikujaku-zuStorage Hall, Interior: Kujaku-no-ma (Peacock Room), detail, view of original from Kyaku-den (Guest Hall)
 Matsunikujaku-zuStorage Hall, Interior: Kujaku-no-ma (Peacock Room), detail, view of original from Kyaku-den (Guest Hall)
 Sansui-zuStorage Hall, Interior: Sansui-no-ma (Landscape Room), view of original from Kyaku-den (Guest Hall)
 Sansui-zuStorage Hall, Interior: Sansui-no-ma (Landscape Room), view of original from Kyaku-den (Guest Hall)
 Sansui-zuStorage Hall, Interior: Sansui-no-ma (Landscape Room), view of the upper seat, view of original from Kyaku-den (Guest Hall)
 Sansui-zuStorage Hall, Interior: Sansui-no-ma (Landscape Room), view of the upper seat, view of original from Kyaku-den (Guest Hall)
 Sansui-zuStorage Hall, Interior: Sansui-no-ma (Landscape Room), view of original from Kyaku-den (Guest Hall)
 Sansui-zuStorage Hall, Interior: Sansui-no-ma (Landscape Room), view of original from Kyaku-den (Guest Hall)
 Sansui-zuStorage Hall, Interior: Sansui-no-ma (Landscape Room), view of original from Kyaku-den (Guest Hall)
 Sansui-zuStorage Hall, Interior: Sansui-no-ma (Landscape Room), view of original from Kyaku-den (Guest Hall)
 Sansui-zuStorage Hall, Interior: Sansui-no-ma (Landscape Room), view of original from Kyaku-den (Guest Hall)
 Sansui-zuStorage Hall, Interior: Sansui-no-ma (Landscape Room), view of original from Kyaku-den (Guest Hall)
 Sansui-zuStorage Hall, Interior: Sansui-no-ma (Landscape Room), view of original from Kyaku-den (Guest Hall)
 Sansui-zuStorage Hall, Interior: Sansui-no-ma (Landscape Room), view of original from Kyaku-den (Guest Hall)
 Sansui-zuStorage Hall, Interior: Sansui-no-ma (Landscape Room), view of the upper seat, view of original from Kyaku-den (Guest Hall)
 Room") Kakushigi-zuStorage Hall, Interior: Bashō-no-ma (Kakushigi-no-ma) (Basho Room (Kakushigi Room)), view of original from Kyaku-den (Guest Hall)
Kakushigi-zuStorage Hall, Interior: Bashō-no-ma (Kakushigi-no-ma) (Basho Room (Kakushigi Room)), view of original from Kyaku-den (Guest Hall) Room") Kakushigi-zuStorage Hall, Interior: Bashō-no-ma (Kakushigi-no-ma) (Basho Room (Kakushigi Room)), view of original from Kyaku-den (Guest Hall)
Kakushigi-zuStorage Hall, Interior: Bashō-no-ma (Kakushigi-no-ma) (Basho Room (Kakushigi Room)), view of original from Kyaku-den (Guest Hall) Room") Kakushigi-zuStorage Hall, Interior: Bashō-no-ma (Kakushigi-no-ma) (Basho Room (Kakushigi Room)), view of original from Kyaku-den (Guest Hall)
Kakushigi-zuStorage Hall, Interior: Bashō-no-ma (Kakushigi-no-ma) (Basho Room (Kakushigi Room)), view of original from Kyaku-den (Guest Hall) Room") Kakushigi-zuStorage Hall, Interior: Bashō-no-ma (Kakushigi-no-ma) (Basho Room (Kakushigi Room)), view of original from Kyaku-den (Guest Hall)
Kakushigi-zuStorage Hall, Interior: Bashō-no-ma (Kakushigi-no-ma) (Basho Room (Kakushigi Room)), view of original from Kyaku-den (Guest Hall) Room") Kakushigi-zuStorage Hall, Interior: Bashō-no-ma (Kakushigi-no-ma) (Basho Room (Kakushigi Room)), view of original from Kyaku-den (Guest Hall)
Kakushigi-zuStorage Hall, Interior: Bashō-no-ma (Kakushigi-no-ma) (Basho Room (Kakushigi Room)), view of original from Kyaku-den (Guest Hall) Room") Kakushigi-zuStorage Hall, Interior: Bashō-no-ma (Kakushigi-no-ma) (Basho Room (Kakushigi Room)), view of original from Kyaku-den (Guest Hall)
Kakushigi-zuStorage Hall, Interior: Bashō-no-ma (Kakushigi-no-ma) (Basho Room (Kakushigi Room)), view of original from Kyaku-den (Guest Hall) Daijō-jiExterior: View of Gate Obscured by Trees
 Daijō-jiExterior: Courtyard
 Daijō-jiExterior: Gate
, Interior: Monkey Room") Gunen-zuKyaku-den (Guest Hall), Interior: Saru-no-ma (Monkey Room)
Gunen-zuKyaku-den (Guest Hall), Interior: Saru-no-ma (Monkey Room), Interior: Monkey Room") Gunen-zuKyaku-den (Guest Hall), Interior: Saru-no-ma (Monkey Room)
Gunen-zuKyaku-den (Guest Hall), Interior: Saru-no-ma (Monkey Room), Interior: Monkey Room") Gunen-zuKyaku-den (Guest Hall), Interior: Saru-no-ma (Monkey Room)
Gunen-zuKyaku-den (Guest Hall), Interior: Saru-no-ma (Monkey Room), Interior: Duck Room, Plum Blossoms and Swimming Birds") Baikayūkin-zuKyaku-den (Guest Hall), Interior: Kamo-no-ma (Duck Room)
Baikayūkin-zuKyaku-den (Guest Hall), Interior: Kamo-no-ma (Duck Room)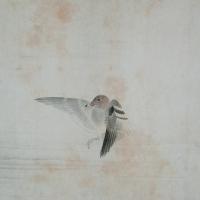 Baikayūkin-zuKyaku-den (Guest Hall), Interior: Kamo-no-ma (Duck Room), Plum Blossoms and Swimming Birds, detail
, Interior: Duck Room, Plum Blossoms and Swimming Birds, detail") Baikayūkin-zuKyaku-den (Guest Hall), Interior: Kamo-no-ma (Duck Room), Plum Blossoms and Swimming Birds, detail
Baikayūkin-zuKyaku-den (Guest Hall), Interior: Kamo-no-ma (Duck Room), Plum Blossoms and Swimming Birds, detail, Interior: Duck Room, Plum Blossoms and Swimming Birds, detail") Baikayūkin-zuKyaku-den (Guest Hall), Interior: Kamo-no-ma (Duck Room), Plum Blossoms and Swimming Birds, detail
Baikayūkin-zuKyaku-den (Guest Hall), Interior: Kamo-no-ma (Duck Room), Plum Blossoms and Swimming Birds, detail, Interior: Duck Room, Plum Blossoms and Swimming Birds, detail") Baikayūkin-zuKyaku-den (Guest Hall), Interior: Kamo-no-ma (Duck Room), Plum Blossoms and Swimming Birds, detail
Baikayūkin-zuKyaku-den (Guest Hall), Interior: Kamo-no-ma (Duck Room), Plum Blossoms and Swimming Birds, detail, Interior: Duck Room, Plum Blossoms and Swimming Birds, detail") Baikayūkin-zuKyaku-den (Guest Hall), Interior: Kamo-no-ma (Duck Room), Plum Blossoms and Swimming Birds, detail
Baikayūkin-zuKyaku-den (Guest Hall), Interior: Kamo-no-ma (Duck Room), Plum Blossoms and Swimming Birds, detail, Interior: Duck Room, detail, butterflies") Baikayūkin-zuKyaku-den (Guest Hall), Interior: Kamo-no-ma (Duck Room), detail, butterflies
Baikayūkin-zuKyaku-den (Guest Hall), Interior: Kamo-no-ma (Duck Room), detail, butterflies Interior: Monkey Room, detail, signature of Rosetsu") Gunen-zuKyaku-den (Guest Hall), Interior: Saru-no-ma (Monkey Room), detail, signature of Rosetsu
Gunen-zuKyaku-den (Guest Hall), Interior: Saru-no-ma (Monkey Room), detail, signature of Rosetsu Interior: Monkey Room, detail, trees") Gunen-zuKyaku-den (Guest Hall), Interior: Saru-no-ma (Monkey Room), detail, trees
Gunen-zuKyaku-den (Guest Hall), Interior: Saru-no-ma (Monkey Room), detail, trees Interior: Monkey Room, detail, mountains") Gunen-zuKyaku-den (Guest Hall), Interior: Saru-no-ma (Monkey Room), detail, mountains
Gunen-zuKyaku-den (Guest Hall), Interior: Saru-no-ma (Monkey Room), detail, mountains Interior: Monkey Room, detail, bamboo") Gunen-zuKyaku-den (Guest Hall), Interior: Saru-no-ma (Monkey Room), detail, bamboo
Gunen-zuKyaku-den (Guest Hall), Interior: Saru-no-ma (Monkey Room), detail, bamboo Interior: Monkey Room, detail, monkey") Gunen-zuKyaku-den (Guest Hall), Interior: Saru-no-ma (Monkey Room), detail, monkey
Gunen-zuKyaku-den (Guest Hall), Interior: Saru-no-ma (Monkey Room), detail, monkey Interior: Monkey Room, detail, monkeys") Gunen-zuKyaku-den (Guest Hall), Interior: Saru-no-ma (Monkey Room), detail, Gunen-zu
Gunen-zuKyaku-den (Guest Hall), Interior: Saru-no-ma (Monkey Room), detail, Gunen-zu Interior: Monkey Room, detail, baby monkey") Gunen-zuKyaku-den (Guest Hall), Interior: Saru-no-ma (Monkey Room), detail, baby monkey
Gunen-zuKyaku-den (Guest Hall), Interior: Saru-no-ma (Monkey Room), detail, baby monkey Interior: Monkey Room, detail, monkeys") Gunen-zuKyaku-den (Guest Hall), Interior: Saru-no-ma (Monkey Room), detail, Gunen-zu
Gunen-zuKyaku-den (Guest Hall), Interior: Saru-no-ma (Monkey Room), detail, Gunen-zu Interior: Monkey Room, detail, monkeys") Gunen-zuKyaku-den (Guest Hall), Interior: Saru-no-ma (Monkey Room), detail, Gunen-zu
Gunen-zuKyaku-den (Guest Hall), Interior: Saru-no-ma (Monkey Room), detail, Gunen-zu Interior: Monkey Room, detail") Gunen-zuKyaku-den (Guest Hall), Interior: Saru-no-ma (Monkey Room), detail
Gunen-zuKyaku-den (Guest Hall), Interior: Saru-no-ma (Monkey Room), detail Interior: Monkey Room, detail") Gunen-zuKyaku-den (Guest Hall), Interior: Saru-no-ma (Monkey Room), detail
Gunen-zuKyaku-den (Guest Hall), Interior: Saru-no-ma (Monkey Room), detail Interior: Monkey Room, detail") Gunen-zuKyaku-den (Guest Hall), Interior: Saru-no-ma (Monkey Room), detail
Gunen-zuKyaku-den (Guest Hall), Interior: Saru-no-ma (Monkey Room), detail Interior: Monkey Room, detail") Gunen-zuKyaku-den (Guest Hall), Interior: Saru-no-ma (Monkey Room), detail
Gunen-zuKyaku-den (Guest Hall), Interior: Saru-no-ma (Monkey Room), detail Interior: Monkey Room, detail") Gunen-zuKyaku-den (Guest Hall), Interior: Saru-no-ma (Monkey Room), detail
Gunen-zuKyaku-den (Guest Hall), Interior: Saru-no-ma (Monkey Room), detail Interior: Monkey Room, detail") Gunen-zuKyaku-den (Guest Hall), Interior: Saru-no-ma (Monkey Room), detail
Gunen-zuKyaku-den (Guest Hall), Interior: Saru-no-ma (Monkey Room), detail Interior: Monkey Room, detail") Gunen-zuKyaku-den (Guest Hall), Interior: Saru-no-ma (Monkey Room), detail
Gunen-zuKyaku-den (Guest Hall), Interior: Saru-no-ma (Monkey Room), detail Interior Kakushigi (Basho) Room") Kakushigi-zuKyaku-den (Guest Hall), Interior: Bashō-no-ma (Kakushigi-no-ma) (Basho Room (Kakushigi Room))
Kakushigi-zuKyaku-den (Guest Hall), Interior: Bashō-no-ma (Kakushigi-no-ma) (Basho Room (Kakushigi Room)) Interior Kakushigi (Basho) Room") Kakushigi-zuKyaku-den (Guest Hall), Interior: Bashō-no-ma (Kakushigi-no-ma) (Basho Room (Kakushigi Room))
Kakushigi-zuKyaku-den (Guest Hall), Interior: Bashō-no-ma (Kakushigi-no-ma) (Basho Room (Kakushigi Room)) Interior Kakushigi (Basho) Room") Kakushigi-zuKyaku-den (Guest Hall), Interior: Bashō-no-ma (Kakushigi-no-ma) (Basho Room (Kakushigi Room))
Kakushigi-zuKyaku-den (Guest Hall), Interior: Bashō-no-ma (Kakushigi-no-ma) (Basho Room (Kakushigi Room)) Interior Kakushigi (Basho) Room") Kakushigi-zuKyaku-den (Guest Hall), Interior: Bashō-no-ma (Kakushigi-no-ma) (Basho Room (Kakushigi Room))
Kakushigi-zuKyaku-den (Guest Hall), Interior: Bashō-no-ma (Kakushigi-no-ma) (Basho Room (Kakushigi Room)) Interior Kakushigi (Basho) Room") Kakushigi-zuKyaku-den (Guest Hall), Interior: Bashō-no-ma (Kakushigi-no-ma) (Basho Room (Kakushigi Room))
Kakushigi-zuKyaku-den (Guest Hall), Interior: Bashō-no-ma (Kakushigi-no-ma) (Basho Room (Kakushigi Room)) Interior: Hall") Daijō-jiKyaku-den (Guest Hall), Interior: Hall
Daijō-jiKyaku-den (Guest Hall), Interior: Hall Interior: View of Peacock Room") Matsunikujaku-zuKyaku-den (Guest Hall), Interior: View of Kujaku-no-ma (Peacock Room)
Matsunikujaku-zuKyaku-den (Guest Hall), Interior: View of Kujaku-no-ma (Peacock Room) Interior: View of Peacock Room and hallway") Matsunikujaku-zuKyaku-den (Guest Hall), Interior: View of Kujaku-no-ma (Peacock Room) and hallway
Matsunikujaku-zuKyaku-den (Guest Hall), Interior: View of Kujaku-no-ma (Peacock Room) and hallway Interior: Farming Room") Shikikōsaku-zuKyaku-den (Guest Hall), Interior: Nōgyō-no-ma (Agriculture Room)
Shikikōsaku-zuKyaku-den (Guest Hall), Interior: Nōgyō-no-ma (Agriculture Room) Interior: Landscape Room") Sansui-zuKyaku-den (Guest Hall), Interior: Sansui-no-ma (Landscape Room)
Sansui-zuKyaku-den (Guest Hall), Interior: Sansui-no-ma (Landscape Room) Interior: Landscape Room, view of the upper seat") Sansui-zuKyaku-den (Guest Hall), Interior: Sansui-no-ma (Landscape Room), view of the upper seat
Sansui-zuKyaku-den (Guest Hall), Interior: Sansui-no-ma (Landscape Room), view of the upper seat Interior: Landscape Room, view from upper seat") Sansui-zuKyaku-den (Guest Hall), Interior: Sansui-no-ma (Landscape Room), view from upper seat
Sansui-zuKyaku-den (Guest Hall), Interior: Sansui-no-ma (Landscape Room), view from upper seat Interior: Landscape Room, view of upper seat") Sansui-zuKyaku-den (Guest Hall), Interior: Sansui-no-ma (Landscape Room), view of upper seat
Sansui-zuKyaku-den (Guest Hall), Interior: Sansui-no-ma (Landscape Room), view of upper seat Interior: Mountain Peaks Above the Clouds (Bare Mountain) Room") Gunzanrochō-zuKyaku-den (Guest Hall), Interior: Hageyama-no-ma (Bare Mountains Room)
Gunzanrochō-zuKyaku-den (Guest Hall), Interior: Hageyama-no-ma (Bare Mountains Room) Interior: Mountain Peaks Above the Clouds (Bare Mountain) Room") Gunzanrochō-zuKyaku-den (Guest Hall), Interior: Hageyama-no-ma (Bare Mountains Room)
Gunzanrochō-zuKyaku-den (Guest Hall), Interior: Hageyama-no-ma (Bare Mountains Room) Interior: Mountain Peaks Above the Clouds (Bare Mountain) Room") Gunzanrochō-zuKyaku-den (Guest Hall), Interior: Hageyama-no-ma (Bare Mountains Room)
Gunzanrochō-zuKyaku-den (Guest Hall), Interior: Hageyama-no-ma (Bare Mountains Room) Interior: Mountain Peaks Above the Clouds (Bare Mountain) Room") Gunzanrochō-zuKyaku-den (Guest Hall), Interior: Hageyama-no-ma (Bare Mountains Room)
Gunzanrochō-zuKyaku-den (Guest Hall), Interior: Hageyama-no-ma (Bare Mountains Room) Interior: Mountain Peaks Above the Clouds (Bare Mountain) Room, detail of screen handles") Gunzanrochō-zuKyaku-den (Guest Hall), Interior: Hageyama-no-ma (Bare Mountains Room)
Gunzanrochō-zuKyaku-den (Guest Hall), Interior: Hageyama-no-ma (Bare Mountains Room) Interior: Mountain Peaks Above the Clouds (Bare Mountain) Room, detail of screen handle") Gunzanrochō-zuKyaku-den (Guest Hall), Interior: Hageyama-no-ma (Bare Mountains Room)
Gunzanrochō-zuKyaku-den (Guest Hall), Interior: Hageyama-no-ma (Bare Mountains Room) Daijō-jiExterior: Courtyard
 Daijō-jiExterior: Courtyard
 Daijō-jiExterior: Courtyard
 Daijō-jiExterior: Gate, Detail of Ceiling
 Daijō-jiExterior: Courtyard
 Daijō-jiExterior: Courtyard
 Daijō-jiExterior: Bell
 Daijō-jiExterior: Detail of Bell Structure
 Daijō-jiExterior: Bell
, Exterior") Daijō-jiKyaku-den (Guest Hall), Exterior
Daijō-jiKyaku-den (Guest Hall), Exterior, Exterior: Detail of Roof") Daijō-jiKyaku-den (Guest Hall), Exterior: Detail of Roof
Daijō-jiKyaku-den (Guest Hall), Exterior: Detail of Roof, Exterior") Daijō-jiKyaku-den (Guest Hall), Exterior
Daijō-jiKyaku-den (Guest Hall), Exterior Daijō-jiExterior
 Daijō-jiExterior
, Exterior: Detail of Gable") Daijō-jiKyaku-den (Guest Hall), Exterior: Detail of Gable
Daijō-jiKyaku-den (Guest Hall), Exterior: Detail of Gable Daijō-jiExterior
 Daijō-jiExterior: Jizo Shrine
 Daijō-jiExterior
, Exterior: Detail of Gable") Daijō-jiKyaku-den (Guest Hall), Exterior: Detail of Gable
Daijō-jiKyaku-den (Guest Hall), Exterior: Detail of Gable, Exterior: Detail of Gable") Daijō-jiKyaku-den (Guest Hall), Exterior: Detail of Gable
Daijō-jiKyaku-den (Guest Hall), Exterior: Detail of Gable, Exterior") Daijō-jiKyaku-den (Guest Hall), Exterior
Daijō-jiKyaku-den (Guest Hall), Exterior, Interior: Hermit Room, detail") Gunsen-zuKyaku-den (Guest Hall), Interior: Sennin-no-ma (Immortals/Hermit Room), detail
Gunsen-zuKyaku-den (Guest Hall), Interior: Sennin-no-ma (Immortals/Hermit Room), detail, Interior: Hermit Room, detail") Gunsen-zuKyaku-den (Guest Hall), Interior: Sennin-no-ma (Immortals/Hermit Room), detail
Gunsen-zuKyaku-den (Guest Hall), Interior: Sennin-no-ma (Immortals/Hermit Room), detail, Interior: Hermit Room, detail") Gunsen-zuKyaku-den (Guest Hall), Interior: Sennin-no-ma (Immortals/Hermit Room), detail
Gunsen-zuKyaku-den (Guest Hall), Interior: Sennin-no-ma (Immortals/Hermit Room), detail, Interior: Hermit Room") Gunsen-zuKyaku-den (Guest Hall), Interior: Sennin-no-ma (Immortals/Hermit Room)
Gunsen-zuKyaku-den (Guest Hall), Interior: Sennin-no-ma (Immortals/Hermit Room), Interior: Hermit Room") Gunsen-zuKyaku-den (Guest Hall), Interior: Sennin-no-ma (Immortals/Hermit Room)
Gunsen-zuKyaku-den (Guest Hall), Interior: Sennin-no-ma (Immortals/Hermit Room)