View from street
View from street
View of building facades
View of building facades
‘Aynat Cemetery
General view of sayid tombs
‘Aynat Cemetery
View of mausoleum
‘Aynat Cemetery
General view of sayid tombs
‘Aynat Cemetery
General view of sayid tombs
‘Aynat Cemetery
View from site
‘Aynat Cemetery
View of mausoleum
View from street
‘Aynat Cemetery
View of mausoleum
View from street
‘Aynat Cemetery
View of mausoleum
‘Aynat Cemetery
General view of sayid tombs
Qasr Seiyun
View of western facade, facing east from parking area
View of site
View of site
Qasr Seiyun
View from stairs
Qasr Seiyun
View of western facade, facing east from parking area
Qasr Seiyun
View of southern facade, facing north
Qasr Seiyun
View of southern facade, facing north
Distant view from the south
Distant view from the south
Distant view from the south
Distant view from the south
Distant view from the south
Distant view from the south
Distant view from the south
Distant view from the south
Distant view from the south
Distant view from the south
Distant view from the south
Distant view from the south
Distant view from the south
View at top of escarpment just outside of Shibam
View at top of escarpment just outside of Shibam
View at top of escarpment just outside of Shibam
Distant view from the south
Distant view from the south
Distant view from the sayl
View from the south
View from the south
View from the south
View from the south
View from the south
View from the south
View from the south
Distant view from the east
Distant view from the east
View of main city gate
View of Ma’ruf Mosque
View from the east
General view
Skyline
View of Mosque of Queen ‘Arwa in background, minaret of Mosque of Jibla in foreground
‘Amiriyah Madrasa
View of craftsmen working on the pozzolonic plaster finishing (qudhad)
‘Amiriyah Madrasa
View of craftsmen working on the pozzolonic plaster finishing (qudhad)
View of facade with Moghul style details
View of door with traditional lime plaster decoration
Masjid Ba-‘Alawi
View of minaret
View of station (sahah al-muhatah) in the market for weighing goods and loading camels
Seated portrait of boy in red pants
View of mosque from street
View from street
View of minaret
View of inscription on facade
View from street
Detail view of lime plaster decoration
View of lime plaster decoration
View of facade
View of facade
View of facade
Qasr al-Munaysurah
Distant view of northwestern facade with concrete construction in foreground
General view facing north from Qasr al-Fijr
View of newly constructed Dar al-Hadarah next to the Ba’Alawi Mosque
View of new construction next to the Ba’Alawi Mosque and a traditional villa
View of facade
View from street
View from street
View from street
View from street
Qasr al-Ranad
View of eastern facade, facing west from main square
View from street
View from street
View from street
View from street
View of palm trees
View of palm trees
View form road
View of traditional mud brick with new cinderblock
View of facade
View of facade
View of facade
Detail view of facade
View from street
View of minaret
View of facade
View of outer wall
View of facade
View of facade
View of facade
View of facade
View of facade
Dar bin Sahil al-Kaf
Detail view of roof decor
View facing north
View of mixed earthen and concrete construction, facing north
View facing north
Dar al-Mihdar
Northwest view from balcony
Dar al-Mihdar
Northwest view from balcony
View of inner courtyard
Distant view
Distant view
Masjid Al-Muḥḍār
View facing west: al-Mihdar Mosque to left, Qasr al-Fijr in foreground
Masjid Al-Muḥḍār
View facing west: al-Mihdar Mosque to left, Qasr al-Fijr in foreground
Dar al-Mihdar
View of southern facade, facing west
Dar al-Mihdar
View of western facade, facing east
View of facade
View from Dar al-Mihdar, facing south
View from Dar al-Mihdar, facing south
View of minaret
View facing north from Dar al-Mihdar, Al-Kaf Mosque at center
View of minaret
Masjid Ba-‘Alawi
View of eastern facade, facing northwest from street level
Masjid Ba-‘Alawi
View of eastern facade, facing northwest from street level
Masjid Ba-‘Alawi
View of eastern facade, facing northwest from street level
Masjid Ba-‘Alawi
View of southeastern corner, facing west from street level
Distant view
Distant view
Qasr Buqshan
Distant view
Khaylah Buqshan
View of facade
Khaylah Buqshan
Distant view of facade
Khaylah Buqshan
View of facade
Khaylah Buqshan
View of doorway
Khaylah Buqshan
View from inner courtyard
Khaylah Buqshan
View from roof terrace
Khaylah Buqshan
View of inner courtyard from roof terrace
Qasr Buqshan
Distant View
Tomb of Habib Ali bin Hassan al-Attas
View of western facade, facing east
View from inside
Facade
Facade
View from North
View from South
View from east through al-Siq Entryway
Ibrahim Hashem House
View from roof on Jabal Amman, with Amman Citadel visible to northeast on Jabal al-Qal'a
Ibrahim Hashem House
Facade with View of Amman Citadel
Ibrahim Hashem House
Facade with View of Amman Citadel
Columbia Global Center Amman
View from atrium
Ibrahim Hashem House
View from room
Ibrahim Hashem House
View from room
Ibrahim Hashem House
View from room
Ibrahim Hashem House
View from room
View from central area of forum
View of nymphaeum east from Cardo Maximus
View from southeast side of theater
View of Tomb of Unayshu (قبر عنيشو) and other tombs and caves
Ca' Dario
view of southern facade from Campiello Barbaro
Ca' Dario
view of southern facade from Campiello Barbaro
Ca' Dario
view of southern facade from Campiello Barbaro
Ca' Dario
view of southern facade from Campiello Barbaro
Canal Grande
view East from the Ponte dell'Accademia
Canal Grande
view East from the Ponte dell'Accademia
Palazzo Franchetti
view from the Ponte dell'Accademia
Canal Grande
view East from the Ponte dell'Accademia
Palazzo Franchetti
view from the Ponte dell'Accademia
Arsenale di Venezia
general street view of Rio de l'Arsenale and Fondamenta de l'Arsenal towards Arsenale Gate
view facing West on Fondamenta Arsenale of buildings across Rio dell'Arsenale, approaching the gates of Arsenale di Venezia
Arsenale di Venezia
Arsenale Gate from the Rio de l'Arsenale and the Fondamenta de l'Arsenal
view facing West on Fondamenta Arsenale of buildings across Rio dell'Arsenale, approaching the gates of Arsenale di Venezia
Arsenale di Venezia
Arsenale Gate from the Rio dell'Arsenale and the Fondamenta Arsenale
Porta d'Acqua
Easternmost tower
Porta d'Acqua
Westernmost tower
Porta d'Acqua
view from the Ponte del Paradiso
Porta d'Acqua
view from the Ponte del Paradiso
Arsenale di Venezia
view from gate towards interior wooden bridge
Porta d'Acqua
detail of clock and dedicatory inscription
Arsenale di Venezia
detail of relief on Arsenale wall on eastern side of Rio dell'Arsenale
Arsenale di Venezia
view of Porta Magna with Porta d'Acqua to right
Porta Magna
detail of lion
Goddess Bellona
detail
Porta Magna
detail of statue of Vigilance
Neptune
detail
Neptune
detail
Mars
detail
Porta Magna
detail of statue of Justice
Porta Magna
detail of arch entrance; Lion of St. Mark and Santa Giustina
Porta Magna
Lion of St. Mark
Porta Magna
detail of commemorative column
Porta Magna
Allegorical Statue
Porta Magna
Allegorical Statue
Porta Magna
Lion of St. Mark
Santa Giustina
Statue of Santa Giustina
Porta Magna
detail of arch entrance
Porta Magna
detail of arch entrance
Porta d'Acqua
detail of clock
Abbazia di San Giorgio Maggiore
view from Bacino San Marco
Basilica di Santa Maria della Salute
view from Bacino San Marco
Piazzetta San Marco
view from Bacino San Marco
Basilica di San Giorgio Maggiore
view from Bacino San Marco
 View from street
 View from street
 View of building facades
 View of building facades
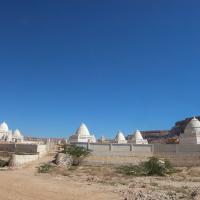 ‘Aynat CemeteryGeneral view of sayid tombs
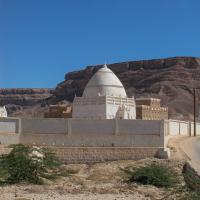 ‘Aynat CemeteryView of mausoleum
 ‘Aynat CemeteryGeneral view of sayid tombs
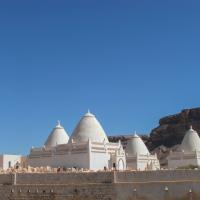 ‘Aynat CemeteryGeneral view of sayid tombs
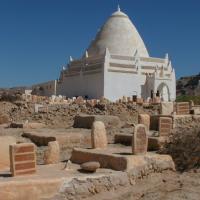 ‘Aynat CemeteryView from site
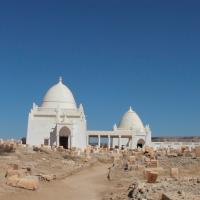 ‘Aynat CemeteryView of mausoleum
 View from street
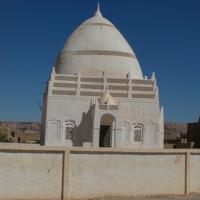 ‘Aynat CemeteryView of mausoleum
 View from street
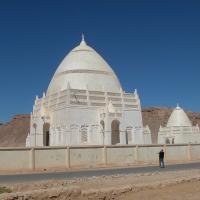 ‘Aynat CemeteryView of mausoleum
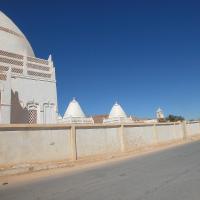 ‘Aynat CemeteryGeneral view of sayid tombs
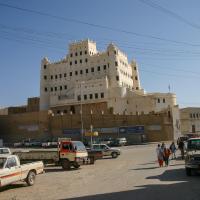 Qasr SeiyunView of western facade, facing east from parking area
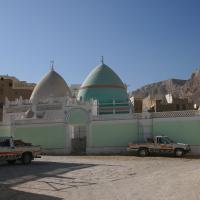 View of site
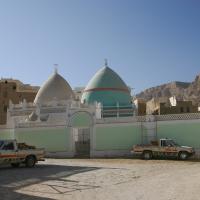 View of site
 Qasr SeiyunView from stairs
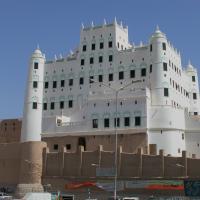 Qasr SeiyunView of western facade, facing east from parking area
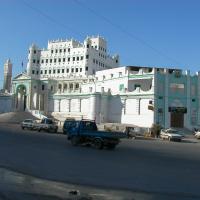 Qasr SeiyunView of southern facade, facing north
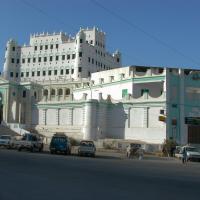 Qasr SeiyunView of southern facade, facing north
 Distant view from the south
 Distant view from the south
 Distant view from the south
 Distant view from the south
 Distant view from the south
 Distant view from the south
 Distant view from the south
 Distant view from the south
 Distant view from the south
 Distant view from the south
 Distant view from the south
 Distant view from the south
 Distant view from the south
 View at top of escarpment just outside of Shibam
 View at top of escarpment just outside of Shibam
 View at top of escarpment just outside of Shibam
 Distant view from the south
 Distant view from the south
 Distant view from the sayl
 View from the south
 View from the south
 View from the south
 View from the south
 View from the south
 View from the south
 View from the south
 Distant view from the east
 Distant view from the east
 View of main city gate
 View of Ma’ruf Mosque
 View from the east
 General view
 Skyline
 View of Mosque of Queen ‘Arwa in background, minaret of Mosque of Jibla in foreground
") ‘Amiriyah MadrasaView of craftsmen working on the pozzolonic plaster finishing (qudhad)
‘Amiriyah MadrasaView of craftsmen working on the pozzolonic plaster finishing (qudhad)") ‘Amiriyah MadrasaView of craftsmen working on the pozzolonic plaster finishing (qudhad)
‘Amiriyah MadrasaView of craftsmen working on the pozzolonic plaster finishing (qudhad) View of facade with Moghul style details
 View of door with traditional lime plaster decoration
 Masjid Ba-‘AlawiView of minaret
 in the market for weighing goods and loading camels") View of station (sahah al-muhatah) in the market for weighing goods and loading camels
View of station (sahah al-muhatah) in the market for weighing goods and loading camels Seated portrait of boy in red pants
 View of mosque from street
 View from street
 View of minaret
 View of inscription on facade
 View from street
 Detail view of lime plaster decoration
 View of lime plaster decoration
 View of facade
 View of facade
 View of facade
 Qasr al-MunaysurahDistant view of northwestern facade with concrete construction in foreground
 General view facing north from Qasr al-Fijr
 View of newly constructed Dar al-Hadarah next to the Ba’Alawi Mosque
 View of new construction next to the Ba’Alawi Mosque and a traditional villa
 View of facade
 View from street
 View from street
 View from street
 View from street
 Qasr al-RanadView of eastern facade, facing west from main square
 View from street
 View from street
 View from street
 View from street
 View of palm trees
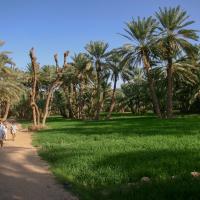 View of palm trees
 View form road
 View of traditional mud brick with new cinderblock
 View of facade
 View of facade
 View of facade
 Detail view of facade
 View from street
 View of minaret
 View of facade
 View of outer wall
 View of facade
 View of facade
 View of facade
 View of facade
 View of facade
 Dar bin Sahil al-KafDetail view of roof decor
 View facing north
, mixed earthen and concrete construction") View of mixed earthen and concrete construction, facing north
View of mixed earthen and concrete construction, facing north") View facing north
View facing north Dar al-MihdarNorthwest view from balcony
 Dar al-MihdarNorthwest view from balcony
 View of inner courtyard
 Distant view
 Distant view
 Masjid Al-MuḥḍārView facing west: al-Mihdar Mosque to left, Qasr al-Fijr in foreground
 Masjid Al-MuḥḍārView facing west: al-Mihdar Mosque to left, Qasr al-Fijr in foreground
 Dar al-MihdarView of southern facade, facing west
 Dar al-MihdarView of western facade, facing east
 View of facade
, from Dar al-Mihdar") View from Dar al-Mihdar, facing south
View from Dar al-Mihdar, facing south, from Dar al-Mihdar") View from Dar al-Mihdar, facing south
View from Dar al-Mihdar, facing south View of minaret
; al-Kaf Mosque at center") View facing north from Dar al-Mihdar, Al-Kaf Mosque at center
View facing north from Dar al-Mihdar, Al-Kaf Mosque at center View of minaret
 Masjid Ba-‘AlawiView of eastern facade, facing northwest from street level
 Masjid Ba-‘AlawiView of eastern facade, facing northwest from street level
 Masjid Ba-‘AlawiView of eastern facade, facing northwest from street level
 Masjid Ba-‘AlawiView of southeastern corner, facing west from street level
 Distant view
 Distant view
 Qasr BuqshanDistant view
 Khaylah BuqshanView of facade
 Khaylah BuqshanDistant view of facade
 Khaylah BuqshanView of facade
 Khaylah BuqshanView of doorway
 Khaylah BuqshanView from inner courtyard
 Khaylah BuqshanView from roof terrace
 Khaylah BuqshanView of inner courtyard from roof terrace
 Qasr BuqshanDistant View
 Tomb of Habib Ali bin Hassan al-AttasView of western facade, facing east
 View from inside
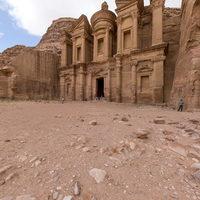 Facade
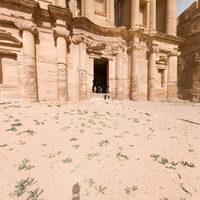 Facade
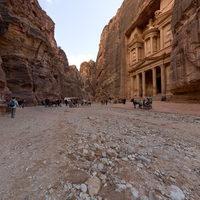 View from North
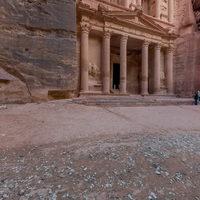 View from South
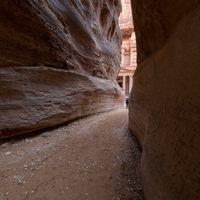 View from east through al-Siq Entryway
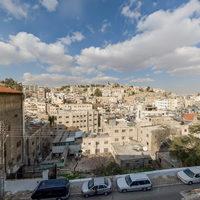 Ibrahim Hashem HouseView from roof on Jabal Amman, with Amman Citadel visible to northeast on Jabal al-Qal'a
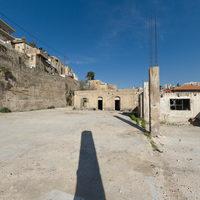 Ibrahim Hashem HouseFacade with View of Amman Citadel
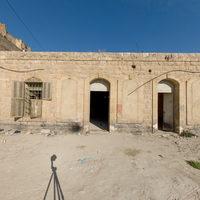 Ibrahim Hashem HouseFacade with View of Amman Citadel
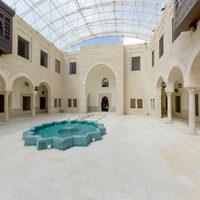 Columbia Global Center AmmanView from atrium
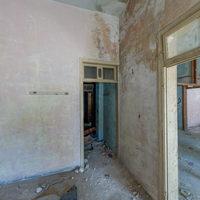 Ibrahim Hashem HouseView from room
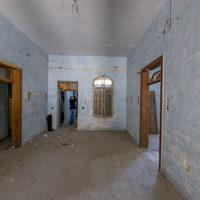 Ibrahim Hashem HouseView from room
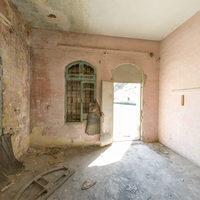 Ibrahim Hashem HouseView from room
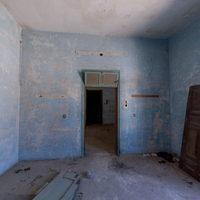 Ibrahim Hashem HouseView from room
 View from central area of forum
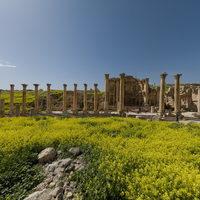 View of nymphaeum east from Cardo Maximus
 View from southeast side of theater
 View of Tomb of Unayshu (قبر عنيشو) and other tombs and caves
 Ca' Darioview of southern facade from Campiello Barbaro
 Ca' Darioview of southern facade from Campiello Barbaro
 Ca' Darioview of southern facade from Campiello Barbaro
 Ca' Darioview of southern facade from Campiello Barbaro
 Canal Grandeview East from the Ponte dell'Accademia
 Canal Grandeview East from the Ponte dell'Accademia
 Palazzo Franchettiview from the Ponte dell'Accademia
 Canal Grandeview East from the Ponte dell'Accademia
 Palazzo Franchettiview from the Ponte dell'Accademia
 Arsenale di Veneziageneral street view of Rio de l'Arsenale and Fondamenta de l'Arsenal towards Arsenale Gate
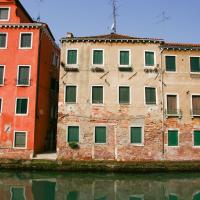 view facing West on Fondamenta Arsenale of buildings across Rio dell'Arsenale, approaching the gates of Arsenale di Venezia
 Arsenale di VeneziaArsenale Gate from the Rio de l'Arsenale and the Fondamenta de l'Arsenal
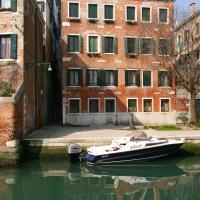 view facing West on Fondamenta Arsenale of buildings across Rio dell'Arsenale, approaching the gates of Arsenale di Venezia
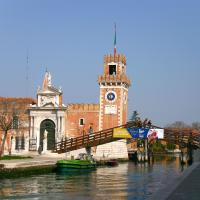 Arsenale di VeneziaArsenale Gate from the Rio dell'Arsenale and the Fondamenta Arsenale
 Porta d'AcquaEasternmost tower
 Porta d'AcquaWesternmost tower
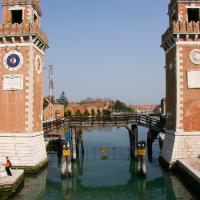 Porta d'Acquaview from the Ponte del Paradiso
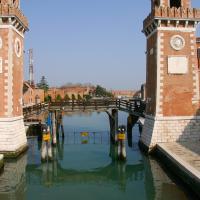 Porta d'Acquaview from the Ponte del Paradiso
 Arsenale di Veneziaview from gate towards interior wooden bridge
 Porta d'Acquadetail of clock and dedicatory inscription
 Arsenale di Veneziadetail of relief on Arsenale wall on eastern side of Rio dell'Arsenale
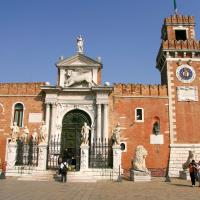 Arsenale di Veneziaview of Porta Magna with Porta d'Acqua to right
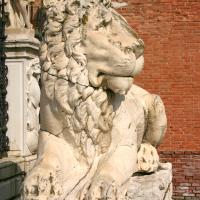 Porta Magnadetail of lion
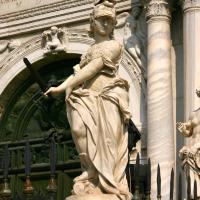 Goddess Bellonadetail
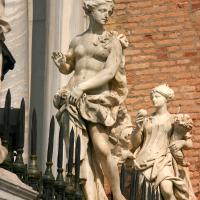 Porta Magnadetail of statue of Vigilance
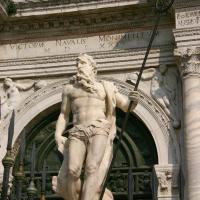 Neptunedetail
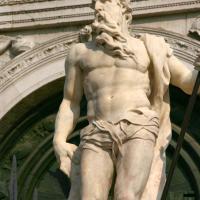 Neptunedetail
 Marsdetail
 Porta Magnadetail of statue of Justice
 Porta Magnadetail of arch entrance; Lion of St. Mark and Santa Giustina
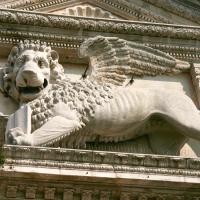 Porta MagnaLion of St. Mark
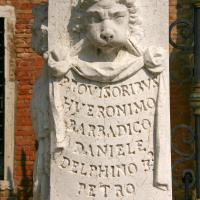 Porta Magnadetail of commemorative column
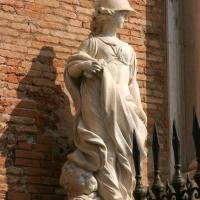 Porta MagnaAllegorical Statue
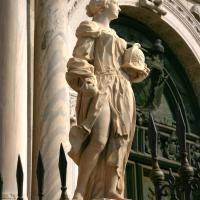 Porta MagnaAllegorical Statue
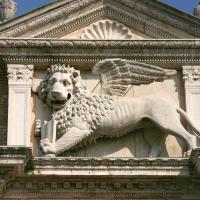 Porta MagnaLion of St. Mark
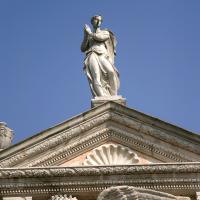 Santa GiustinaStatue of Santa Giustina
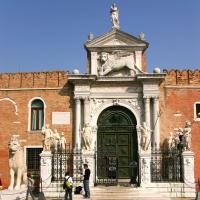 Porta Magnadetail of arch entrance
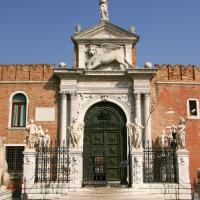 Porta Magnadetail of arch entrance
 Porta d'Acquadetail of clock
 Abbazia di San Giorgio Maggioreview from Bacino San Marco
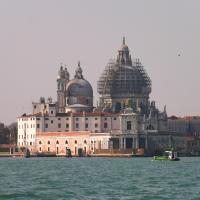 Basilica di Santa Maria della Saluteview from Bacino San Marco
 Piazzetta San Marcoview from Bacino San Marco
 Basilica di San Giorgio Maggioreview from Bacino San Marco